


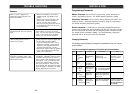
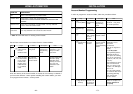

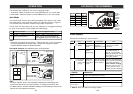
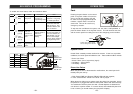
Part 1 Learn signal from Control Module to Control Panel
HOME AUTOMATION
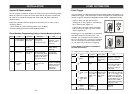
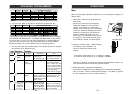
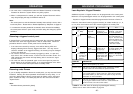
ZONE LED DESCRIPTION
Off Zone is not occupied by any control module
Flashes once This zone is occupied by another control module. Programming
another remote to this zone will overwrite the previous control
module.
Flashes twice This zone is occupied by a remote. You can still program a control
module to this zone, and it will not overwrite the remote you have
in this zone.
Flashes once, This zone is occupied by a remote AND a control module. If you
then twice program another control module to this zone, it will overwrite the
previous control module, but not the remote.
** Table E: Zone LED status for learning control module.
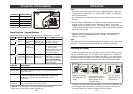
Activate the
control module
by pressing its
learn button
once quickly.
1
2
3
4
[PROG]
[MPIN]
Enter Program-
ming mode
Enter master
password to
programming
mode
3 beeps for valid
password. 1 long beep
for invalid password.
Select learn
control module
programming
[1] to [5]
After you have selected
the control module location,
that zone LED will be on.
After [4] is entered, some
zone LEDs will flash or
stay off. The zone LEDs
represent whether that
zone is already occupied
by another control
module.**See Table E.
Select control
module location
(Max. 5 control
modules)
Select the
location [1], [2],
[3], [4], or [5].
Send signal
from control
module to
control panel.
Once the signal
is transmitted to
the Control Panel,
that signal will be
stored.
You will hear
[Device X Accepted],
where “X” is the control
module location.
[4]
Step Keys Function Description Note
–
16
–
–
41
–
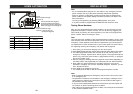
Note:
- Try to mount the sensors as far away from the floor as possible to avoid
damaging them. Mounting the sensors at a higher position will also result in
better operating range.
- Do not mount the sensor to the exterior of the door / window, always mount the
sensor to the interior side of the door / window to avoid being damaged or
stolen by non-intended users.
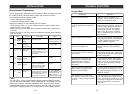
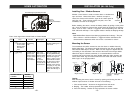
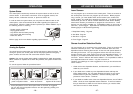
INSTALLATION (ML-100 Only)
3. Single flash
1.
Zone 1
Sensor 1
Triggered
2. Beep___Beep___
Beep___Beep___
............
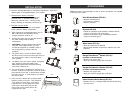
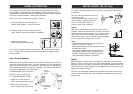
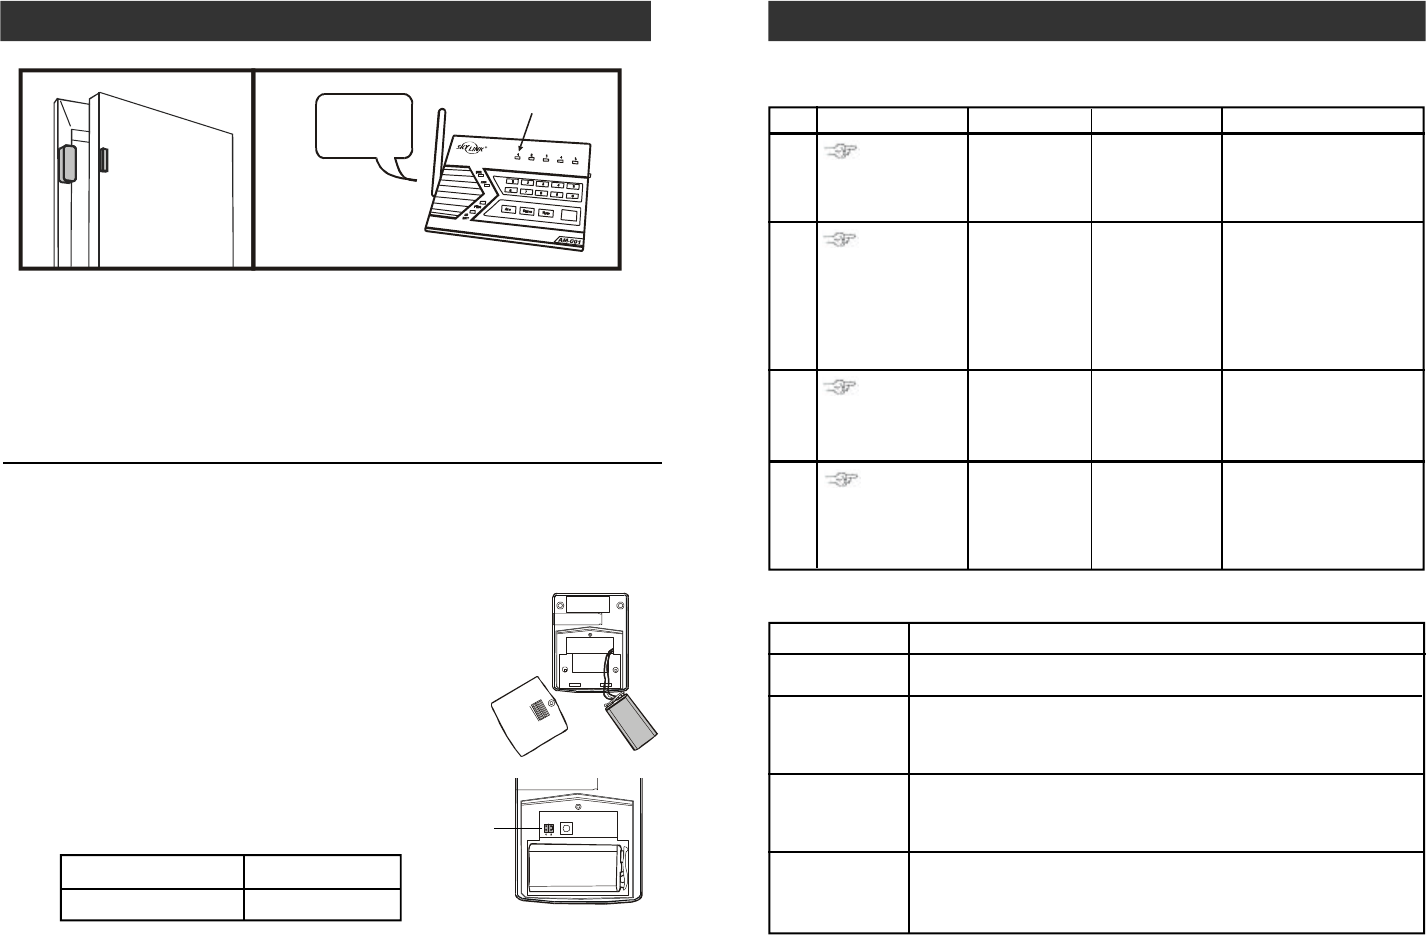
Installing Motion Sensor
Insert Battery
Undo the screw on the back of the motion sensor and
remove the battery cover. Connect a 9V alkaline battery
to the battery connector. Please note the polarity.
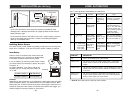
If you are planning to install the motion sensor outdoor,
you should reduce the sensitivity by placing the jumper
at location “2”.
For indoor application, if you want to reduce the
sensitivity, you can change the jumper setting to
“2” as well.
The motion sensor is most suitable for guarding a large area such as living room,
family room, or bedroom. It can also be used to monitor a hallway or stairway.
Sensitivity
Caution:
Depending on the environment, if you experience a false trigger when the motion
sensor is placed outdoors, you should relocate it or even place it indoors. Wind
blowing at a tree, or direct sunshine could cause a false trigger. Therefore, if the
location at where the motion sensor is mounted could cause a false trigger, you
should change the mounting location for such sensor.
Jumper Location 1 High Sensitivity
Jumper Location 2 Low Sensitivity