4.1 Troubleshooting
Installation Manual 83
4.1.2 Connection
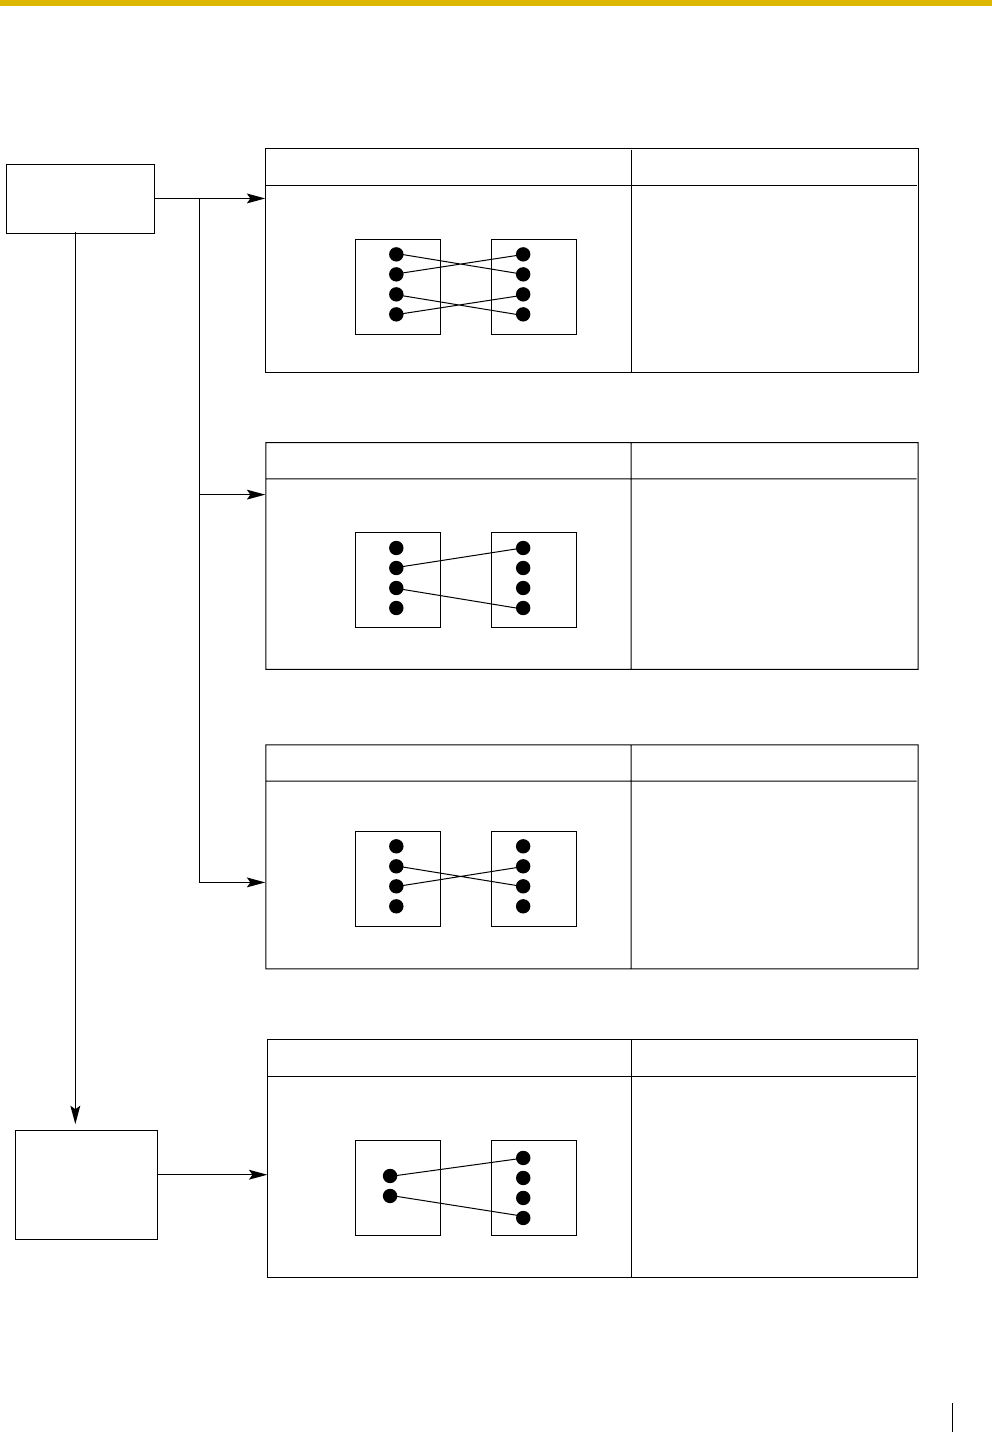
Telephone cord connecting the PBX and a proprietary telephone (PT):
Telephone cord connecting the PBX and a single line telephone (SLT):
Telephone cord connecting the PBX and an SLT that is polarity-sensitive:
CAUSE
The T/R pins are connected to the H/L
pins.
SOLUTION
Use the correct cord (the
inner 2 wires are for T/R and
the outer 2 wires are for H/L).
H
T
R
L
H
T
R
L
PBX
PBX
PBX
Extension
CAUSE
The T/R pins are connected to the H/L
pins.
SOLUTION
Use the correct cord (the
inner 2 wires are for T/R).
H
T
R
L
T
R
Extension
CAUSE
The T and R pins are crossed over.
SOLUTION
Reverse the connections of
the T/R pins.
H
T
R
L
T
R
Extension
Can you dial
an extension?
No
Ye s
Telephone cord connecting an outside (CO) line and the PBX:
CAUSE
The outside (CO) line(s) is
connected to the H/L pins.
SOLUTION
Reconnect the outside
(CO) line(s) to the T/R pins
of the telephone jack using
2-conductor wiring.
T
R
Outside (CO) line PBX
Can you dial
out using an
outside (CO)
line?
No
