


10
NOTES:
HOLD
LINE1 LINE2
Method1:
CONFERENCE
Method2:
CONFERENCE
Method3:
CONFERENCE .
Method4:
CONFERENCE .
1. After pressing the button, the corresponding line will be
placed on hold and the LINE button will blink. The handset can
nowbeplacedonhook withoutdisconnectingtheline.
2. To continue the conversation, pick up the handset and press the
or button.
Therearefivewaystoestablishathree-wayconferencecall.
a. Establish a call on LINE1.
b. Place LINE1 on hold.
c. Establish a call on LINE2.
d. Press the button.
a.Establisha callonLINE2.
b. Place LINE2 on hold.
c. Establish a call on LINE1.
d. Press the button.
a. Establish a call on LINE1.
b. Place LINE1 on hold.
c. Establish a call on LINE2.
d. Place LINE2 on Hold.
e. Press the button
a. With a call established on LINE1, LINE2 rings.
b. Place LINE1 on hold.
c. Answer LINE2.
d. Press the button
7.Three- wayConference
19
10. Date Format
11. Hour Format
12. Set Flash
13. Set Area and LDS
14. Set Language
15. Set Time and Date
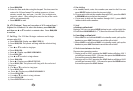
- This selects the format used to display the
date. To select this feature, press and then use
to toggle between MM-DD (Month-Day) and DD-MM (Day-Month).
Press to confirm.
- This selects the format used to display the
time. To select this feature, press and then use
to toggle between 12 hour and 24 hour format. Press to
confirm.
- This selects the length of time for the flash. To
select this feature, press and then use to toggle
between 600mSec, 300mSec, 120mSec, and 100mSec. Press
to confirm. Note that 600mSec is the standard time for
North America.
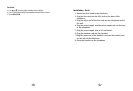
- This sets the local area code and the
code used to dial a long distance number. These values are used
in conjunction with the 7-10-11 button.
a. Press .
b. Enter the area code using the keypad. Do not press
.
c. Enter the LDS code. This is 1 for North America.
d. Press .
e. Press to move to the next item.
- The 1220 supports English, French and
Spanish. To select this feature, press and then use
to select a language. Press to confirm.
- This allows manual entry of the date
and time. Please note that Caller ID will set these values. If you
have CID service, skip this step.
DIAL/OK
DIAL/OK
DIAL/OK
DIAL/OK
DIAL/OK
DIAL/OK
DIAL/OK
DIAL/OK
DIAL/OK
DIAL/OK
DIAL/OK
or
or
or
or
or
st
st
st
st
s
t