


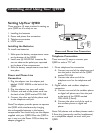

Setting Up Your Q90D
There are four (4) steps involved in setting up
your Q90D so it is ready to use.
1. Installing the batteries
2. Power and phone line connection
3. Telephone connection
4. LOCK switch
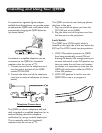
Installing the Batteries
To install new batteries:
1. Slide open the battery compartment cover
on the bottom of the Q90D.
2. Install new (6) NiCAD AA batteries. Be
sure to observe the polarity as imprinted
on the base of the compartment.
3. Slide the battery compartment cover back
into place.
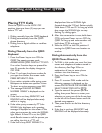
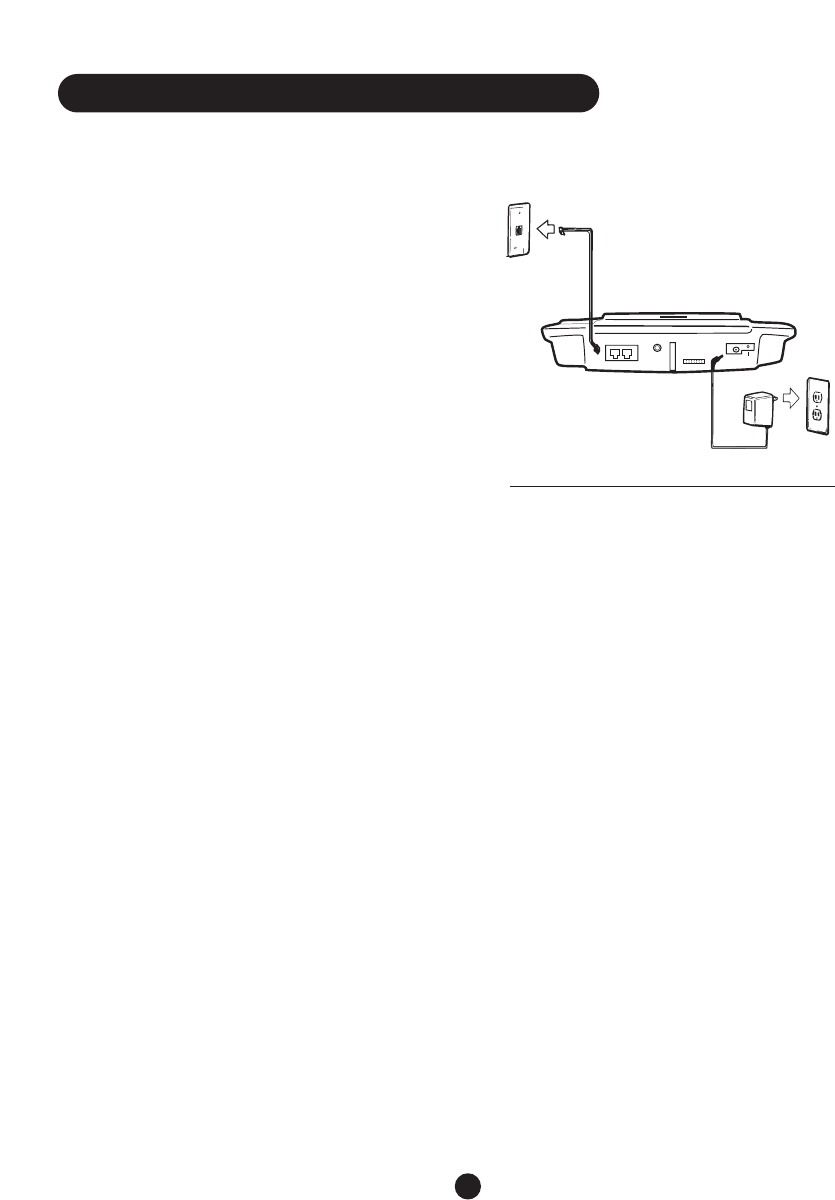
Power and Phone Line
Connection
1. Plug the adapter into the adapter jack
labeled 12VDC 500MA at the back of the
Q90D.
2. Plug the adapter into your wall outlet.
3. Connect one end of the phone cord into
the back of the Q90D marked TO LINE.
4. Connect the other end of the phone cord
to the telephone wall jack.
Note:The adapter provides power to operate
the Q90D while simultaneously charging
the rechargeable batteries in the battery
compartment.You should only use the adapter
supplied with your Q90D.When the Q90D is
not in use, turn the Power OFF, but keep the
adapter plugged in.
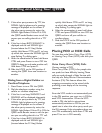
Telephone Connection
There are two (2) ways to connect your
Q90D to make a TTY call.
1. Direct telephone line connection
A. Connect one end of the telephone cord
into the jack at the back of the Q90D
marked TO LINE.
B. Connect the other end of the
telephone cord to the telephone wall
jack.
2. Digital cellular and cordless telephone
connection
A. Connect one end of the cordless phone
or digital cell phone cord into the jack
at the back of the Q90D marked
CELLULAR (2.5mm).
B. Connect the other end of the cord to
the cordless phone or digital cell
phone.
Note: Cell phones and cordless phones need a
2.5mm plug (commonly used for headphones)
or a compatible adapter to work with your
Q90D.
7
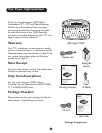
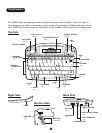
Installing and Using Your Q90D
TO
LINE
TO
PHONE
HCO
SPEAKER
12 VDC
300 MA
CELLULAR
(2.5MM)
Power and Phone Line Connection