


4
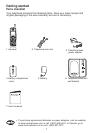
Getting started
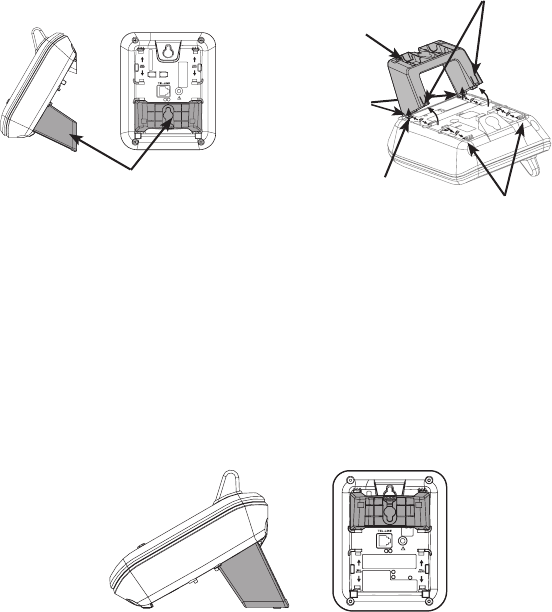
Wall bracket installation (continued)
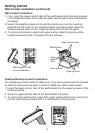
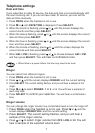
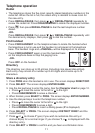
Wall bracket installation:
First, insert the lower portion tabs of the wall bracket into the lower grooves
in the telephone base, then snap the upper portion tabs of the wall bracket
into place.
Mount the telephone base on the wall by positioning it so the mounting
studs t into the holes on the telephone base and wall bracket. Slide the
telephone base down on the mounting studs until it locks into place.
To remove the bracket, press both upper portion tabs rmly and pull the
bracket downward until it releases from the grooves.
1.
2.
3.
Desktop/tabletop bracket installation:
Your telephone comes ready for table use. If you have repositioned the bracket
for wall mounting and now want to return to table use, follow these steps:
Insert the lower portion tabs of the wall bracket into the upper grooves of the
telephone base.
Snap the upper portion tabs of the wall bracket into place.
To remove the wall bracket, press both upper portion tabs rmly inward and
pull the wall bracket upward until it is released from the grooves.
1.
2.
3.
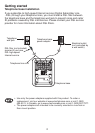
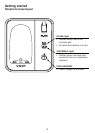
AC 7.5V
Wall bracket in wall
mount orientation
upper grooves
upper portion tabs
lower
portion
tabs
Wall bracket
lower groove
AC 7.5V