


Basic Skills
User's Manual 2-7
TOSHIBA Pocket PC e310 Version
1
Last Saved on 15/03/2002 14:34
ENGLISH using Euro_C.dot Printed on 15/03/2002 as PDA2_UK
Battery Charge Level and Stored Data Protection
If the battery charge level becomes extremely low, or is completely
discharged, the memory data stored in the Toshiba Pocket PC will be
deleted.
When the low battery status icon or the alarm message appears,
immediately connect the AC adapter to your Toshiba Pocket PC and
charge the built-in battery.
The built-in battery gradually discharges even if the device is not being
used. When the Toshiba Pocket PC is left for a long time, the built-in
battery of the Toshiba Pocket PC may completely discharge.
As a precaution, it is recommended that you save the Toshiba
Pocket PC’s memory data to your computer or to a storage card.
The manufacturer is not responsible for data change or data loss due to
battery discharge.
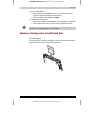
Initial Setup
When using the Toshiba Pocket PC for the first time, carry out the initial
setup according to the procedures below after the built-in battery has
been charged.
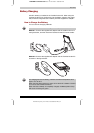
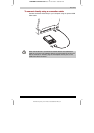
1 Move the battery switch to the “supply” position. The Toshiba
Pocket PC powers on automatically and the Welcome screen
appears. Tap the screen to start the following setup.
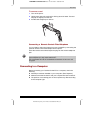
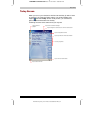
2 Execute touch screen alignment.
When the alignment screen appears, tap the center of the cross target
with the stylus. The next target position changes upon tapping the
target. Five taps completes the positioning alignment. The screen then
changes to the Stylus screen.
■ If a finger or any other object besides the stylus touches the
screen during alignment, the alignment will be cancelled and you
must repeat the procedure.
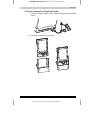
3 Read how to use the stylus.
■ Read and understand the stylus operation, and then tap NEXT.
For more information on stylus operation, see “How to Use the Stylus” in
this chapter.
4 Learn the pop-up menu operation.
■ Read the on-screen explanation and then follow the instructions.
Display the pop-up menu, and cut and paste the data according to
the screen instructions.
■ After you finish the paste operation, this stage is completed. Tap
NEXT.