Loss of AC power
In case of no AC power, the B450D will operate under battery power. To
extend the life of battery operation, some functions of the machine will be
disengaged.
Use only the handset to answer or make calls. Line 1 is the only line that will
remain accessible under battery power.
The keys that are operational under battery power: [M1] ... [M8], [CID], [DIR],
[UP], [DOWN], [DEL], [PREV], [NEXT], [MENU], [SAVE], [QUIT], [CDF],
[REDIAL], [▲], [▼], [FLASH], and the dial pad.
The functions that are operational under battery power: LCD display, machine
setup, Line 1 ringer, Line 1 Caller ID, Caller ID review, Caller ID redial, memory
store, memory review, memory dial, manual dial, flash, handset, and volume
control.
INSTALLATION
14
Desktop Installation
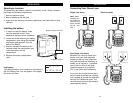
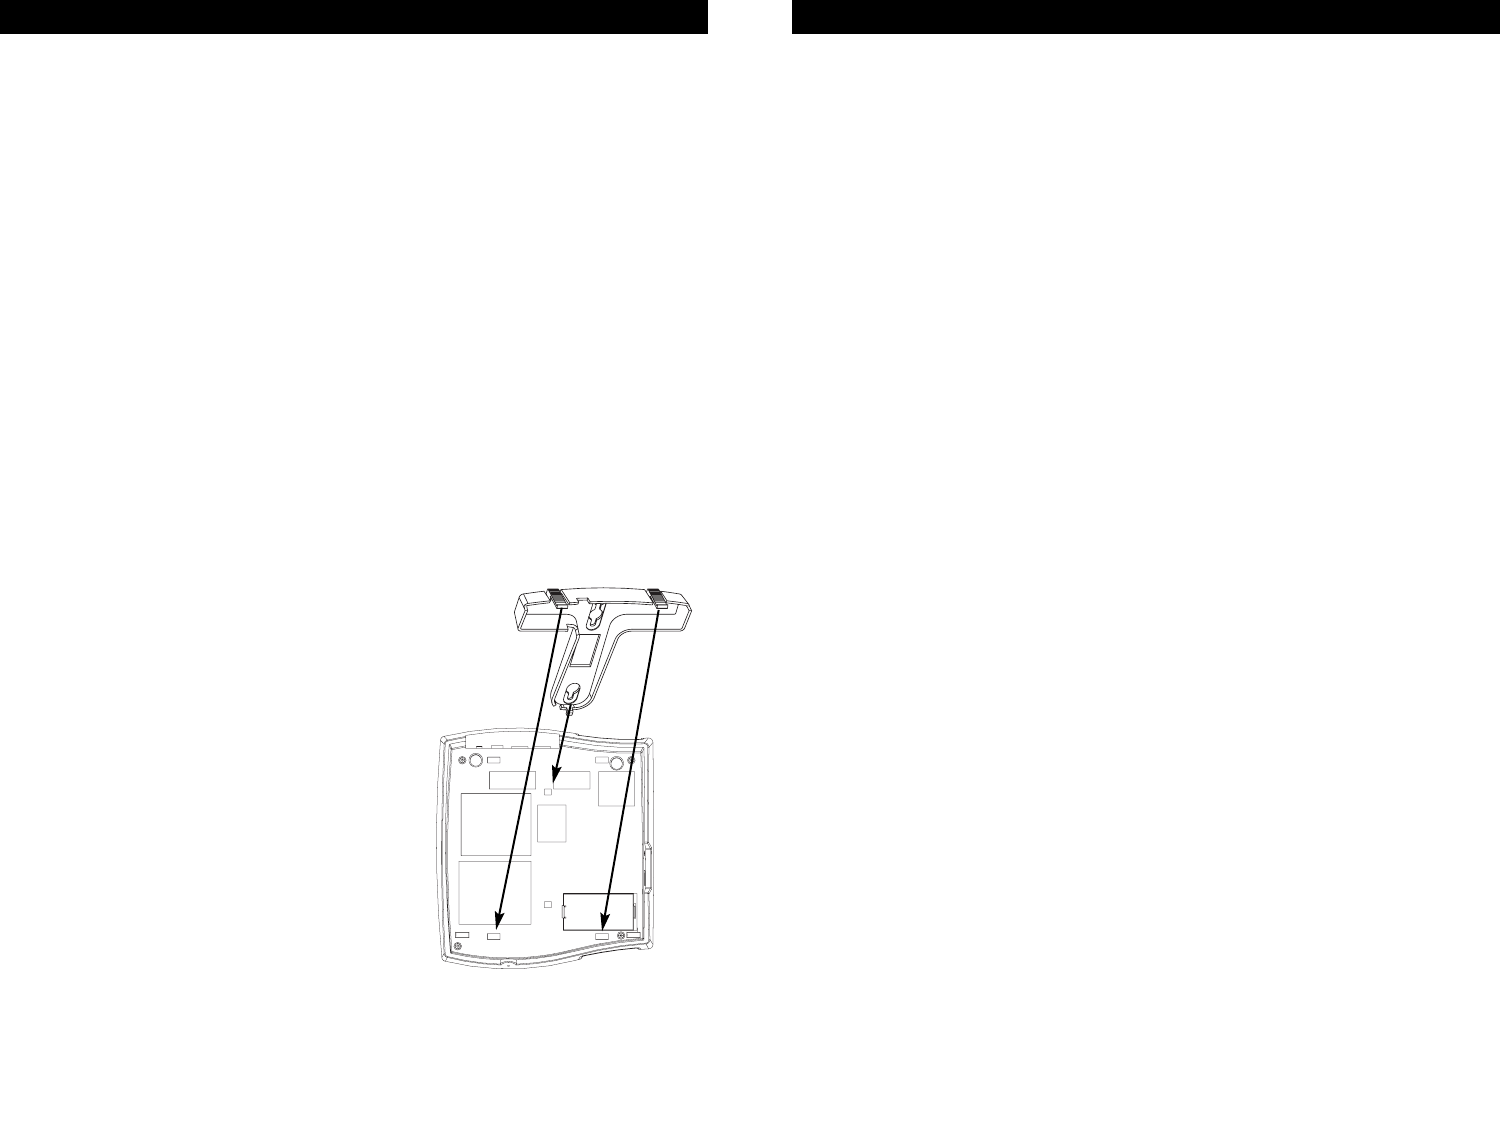
1. If you desire, you can attach the desk/wall mount to the base to elevate the
angle of view to better see the display and keys (install the opposite
direction as shown below for wall mounting).
2. Connect the telephone lines as shown in the section “Connecting your
telephone lines.”
3. Insert the AC adapter cable into the jack on the rear of the telephone.
4. Plug the AC adapter into the wall electrical power outlet.
5. Plug one end of the handset coiled cord into the handset. Plug the other
end of the cord into the handset jack located on the left side of the phone
base.
6. Place the handset in the handset cradle.
Wall Mounting
The telephone may be installed on the studs of a standard wall phone plate.
1. Connect the telephone lines as shown in the section “Connecting your
telephone lines.” If you are installing on a wall mount plate, use the
provided short line cord. You can only install 2 lines unless you purchase
another short line cord.
2. Insert the AC adapter cable into the jack on the rear of the telephone.
3. Plug the AC adapter into the wall
electrical power outlet.
4. Attach the desk/wall mount to the base of
the telephone as shown. Make sure the
cables run through the cable grooves in
the mount so they do not impede wall
mounting.
5. Slip the phone onto the wall, lining up the
wall mounting holes over the wall plate
posts or screws, and then slide the
telephone down so it is firmly in place.
6. Plug one end of the handset coiled cord
into the handset. Plug the other end of
the cord into the handset jack located on
the left side of the phone base.
7. Place the handset in the handset cradle.
INSTALLATION
13


