SoundStation VTX 1000 Operation Manual
32
Administrator’s Guide
SoundStation VTX 1000 Operation Manual
33
Administrator’s Guide
Administrative Setup Overview
The following items are part of the
Administrative Setup area.
The following pages explain how to access,
select, adjust, use, and exit these settings
and functions.
1. Location
1 Location Name Enter a name for this SoundStation VTX 1000’s location.
2 This Phone # Enter this SoundStation VTX 1000’s telephone number.
2. Phone System
1 Flash Timing Set the flash delay to 75, 100, 300, or 600 milliseconds.
2 Caller ID Turn Caller ID (if available) on or off.
3 Modem Setup Select short train time (6seconds) for high quality line or long train (12 seconds)
otherwise.
4 Wideband Monitor Selecting “ON” (default) monitors wideband calls for line quality degradation.
3. Passcode
Set whether or not to require a passcode, and assign a new passcode.
4. Diagnostics
1 Mic Test View the relative level of the sample received by each individual microphone.
2 Console Spkr (Speaker) Test Select acoustic test signals to drive through the SoundStation VTX 1000 speakers
3 Ext Spkr Test Select acoustic test signals to drive through external audio output devices, such as
speakers, PA systems, etc.
4 Modem Statistics View the SoundStation VTX 1000 modem performance for the last call that made use
of a modem connection.
5 Restore Defaults Completely eliminate all settings and data that have been entered since the phone
was first installed and restores original default settings.
5. Software
1 Upgrade Software Dial in to download updated software directly to the SoundStation VTX 1000.
2 Configure Dialing Number Enter the number to be dialed to upgrade software.
3 Configure as DL Server Activate or deactivate the SoundStation VTX 1000’s capability to provide software
upgrades to other VTXs that call it.
(External Speaker)
Press the MENU button. Use the
button
to highlight Admin Setup, then press the
SELECT button.
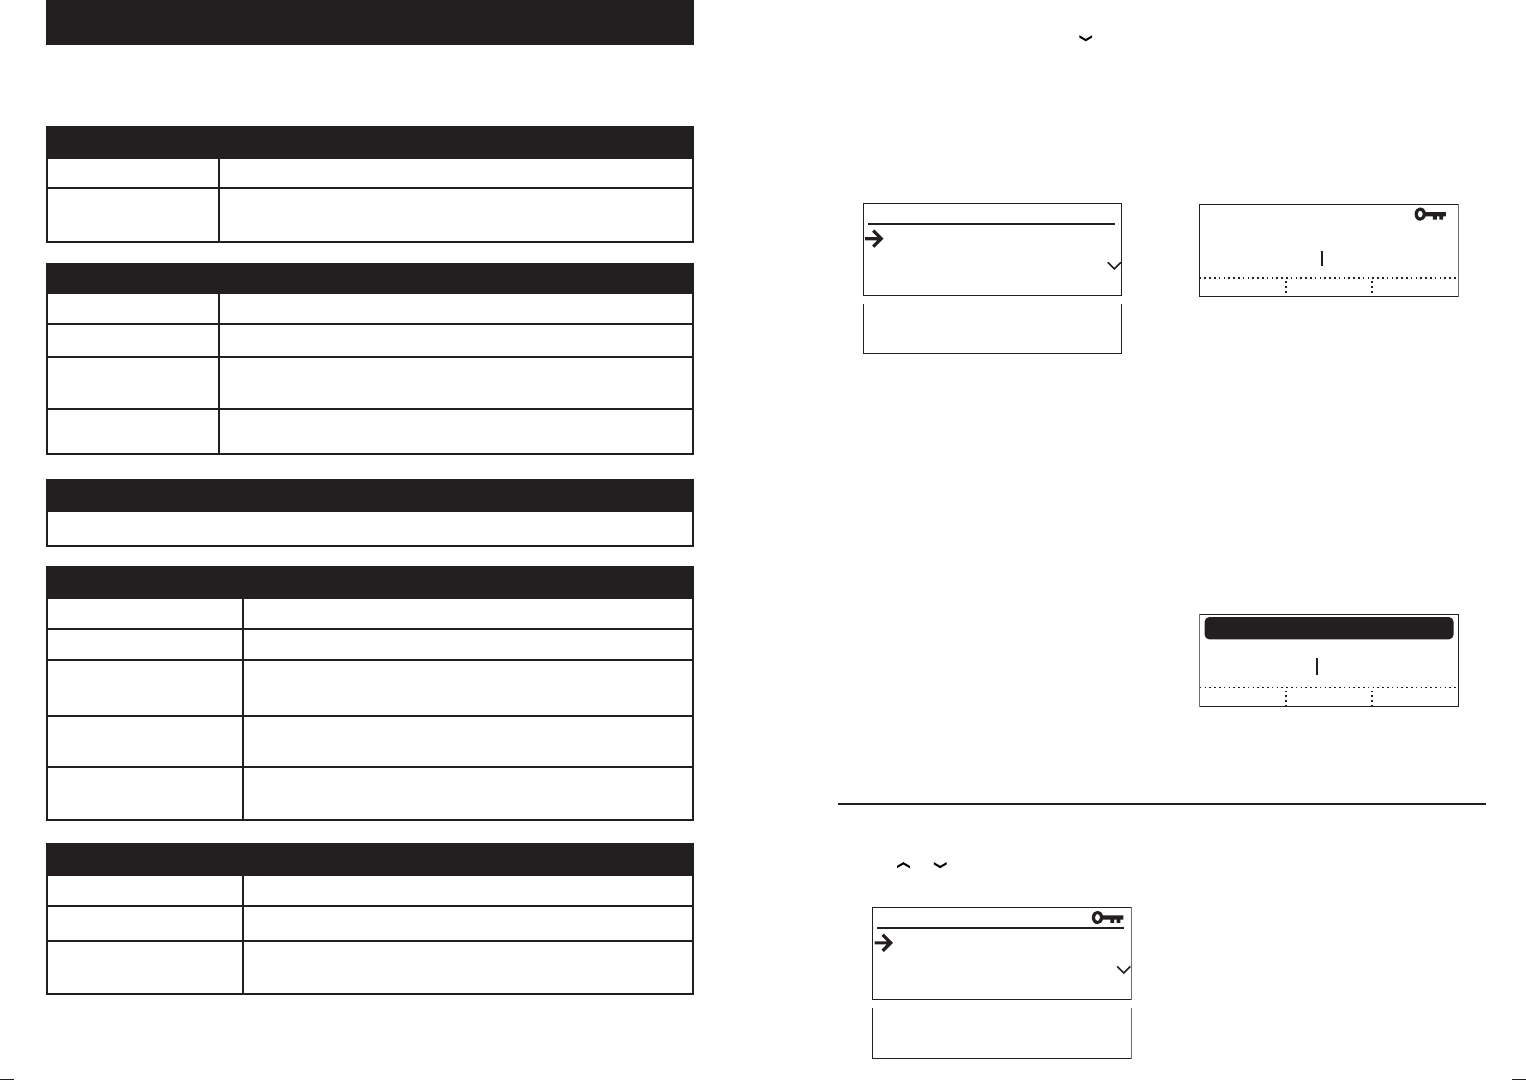
Access Administrative Setup
No Passcode Assigned
If there is no Passcode assigned,
the Admin Setup Menu will be displayed.
Passcode Assigned
If there is a Passcode assigned, use the
number keypad to enter your 3-digit code,
and then press ENTER.
ADMIN SETUP
CANCEL ENTER< DEL>
Passcode:
Use the CANCEL soft key to return
to the Main Menu.
If you make an error,
press <DEL to delete characters.
Caution: Be sure to write down your
passcode in a safe place in case you forget
it. If you cannot remember or find your
passcode, please contact Polycom Support
at www.polycom.com/support and click on
“How to Contact Support and Service” for
your local support contact information.
Note: You can set whether or not to require
a passcode in the “Passcode” section, pg. 37.
CANCEL
PASSCODE:
INCORRECT PASSCODE
ENTER< DEL>
If you enter an incorrect passcode,
the digits you entered will disappear and
you will be returned to the Admin Setup
menu to re-enter your passcode.
Select an Item to Display
Standard Selection
Use the
or
buttons to highlight the
desired item, and press the SELECT button.
Selection Shortcuts
For quick selection of the desired item,
press its number on the keypad.
Some Admin Setup sections have
submenus, which are also numbered for
quick selection, so you can enter a
two-digit number for quickest access.
For example, pressing
2 3 at the main
Admin Setup Menu will select the 2.
Phone system submenu’s 3. modem setup
item.
3. Passcode
4. Diagnostics
5. Software
1. Location
2. Phone System
3. Passcode
ADMIN SETUP
ADMIN SETUP
4. Diagnostics
5. Software
1. Location
2. Phone System
3. Passcode
ADMIN SETUP
3. Passcode
4. Diagnostics
5. Software
1. Location
2. Phone System
3. Passcode
ADMIN SETUP
ADMIN SETUP
4. Diagnostics
5. Software
1. Location
2. Phone System
3. Passcode
ADMIN SETUP


