


2
Setting up
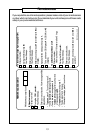
Setting up: follow steps 1-7
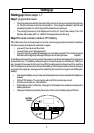
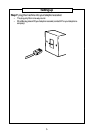
Step 1: plug into the mains
• Plug the adaptor lead into the back of the machine (be sure to push the plug fully
in). Set the volume control to mid-position. Then plug the adaptor into the wall
socket and switch on. Don’t plug into the telephone socket yet.
• The red light comes on, the display will count to 41; there’ll be a beep. Then ‘00'
flashes. alternately with 'Lo'. Wait for the beep before continuing.
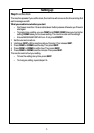
Step 2: fit a leak-resistant, alkaline, PP3 battery
Why? Because if you have a power cut (or the mains supply is disconnected or switched
off), when power is restored or switched on again,
• you won’t have to re-set the clock;
• you won’t lose your messages; and
• you won’t lose any outgoing message you recorded yourself. (The machine comes
with standard outgoing messages but you can record your own instead.)
The battery will come into use only when the power is cut off and will support the memories
for several hours. The battery will eventually run down if power is not restored. (NB If you
plan to switch the power to the machine off for lengthy periods, disconnect the machine
from the telephone socket and remove the battery. You'll have to set the clock and record
any personal outgoing messages when switching the machine on again and refitting the
battery).
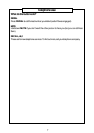
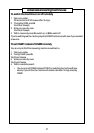
• Remove the battery cover (make sure the telephone is not connected to the telephone
socket).
• Fit the PP3 battery. The connector will only fit the correct way round.
• Put the cover back on. '00' will flash.
• If the battery is low, ‘Lo’ flashes. Unplug from the telephone socket and replace the
battery as above.
• Dispose of batteries carefully. Never burn them or let children play with them.
BATTERY
COVER