


12
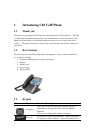
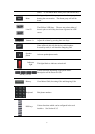
2. Connect the handset to the handset jack using the handset cable in the package.
3. Connect the power supply to the DC port on the back of the phone. Connect the
power supply to a standard power outlet. Note that the power supply will not be
needed if your network provides Power over Ethernet (PoE).
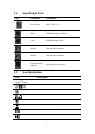
4. The phone’s LCD screen displays “INITIALIZING”. Later, a ready screen displays
the date, time and current network mode.
If your LCD screen displays different information from the above, more information may
need to be entered. Please refer to the next section. If your phone registers into your IP
telephony Server, it is ready to use. If not, continue to read for more configuration
information.
2.2 Network Settings
DHCP is supported by default. This allows the phone to receive an IP address and other
network-related settings (Netmask, IP gateway, DNS server) from the DHCP server. If no
DHCP server is available, the network connection settings must be changed. Follow the
instructions below to change to either PPPoE or static IP.
2.2.1 PPPoE Mode
1. Press the MENU softkey.
2. Scroll down to “3. Settings.”
3. Press OK.
4. Scroll down to “2. Advanced Settings.”
5. Press OK.
6. The LCD will display “INPUT PASSWORD”.
7. Input the password (default value is 123).
8. Press ENTER.
9. Scroll down to “2. Network.”
10. Press OK.
11. Press OK to select WAN Settings.
12. Scroll down to “4. PPPoE Settings.”
13. Press OK.
14. Use the keypad to enter the User Name.
15. Press SAVE softkey.
16. Press DOWN ARROW.
17. Use the keypad to enter the Password.
18. Press SAVE softkey.
19. Press DOWN ARROW.