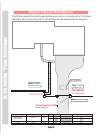
To perform these 4 steps you MUST know EXACTLY where the External Access Control
Device(s) were wired in “Your” EL25! When the table on page 14 is completed by you or
your installer, this will help you understand “Your” personal layout. If you do not know
this, DO NOT PROCEED. Consult your Installer and/or refer to the installation manual for
assistance.
Assign Each External Access Control Device to a Door Number:
When a valid access code is entered
into a external access control device, the Assigned
door's relays
will activate (See Below).
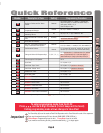
Set Each Relay Mode for the Appropriate Response:
There are
5
different relay modes (Previous Page).
The relay mode determines what the relay will control (a door, alarm, CCTV, etc.). (Next Page)
Set Each Relay's Activation Time:
The relay time determines the amount of time the relay remains
activated. For example, when a strike relay activates to unlock a door, the relay activation time determines
how long the door will remain unlocked. (Next Page)
Assign Each Door Number to One or More Relays:
Defines which relays will activate when a resident
presents a valid access code to an external access control device. (Next Page)
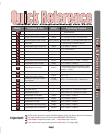
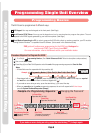
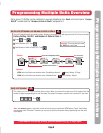
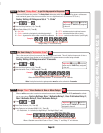
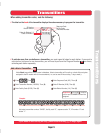
Step 1
Step 2
Step 3
Step 4
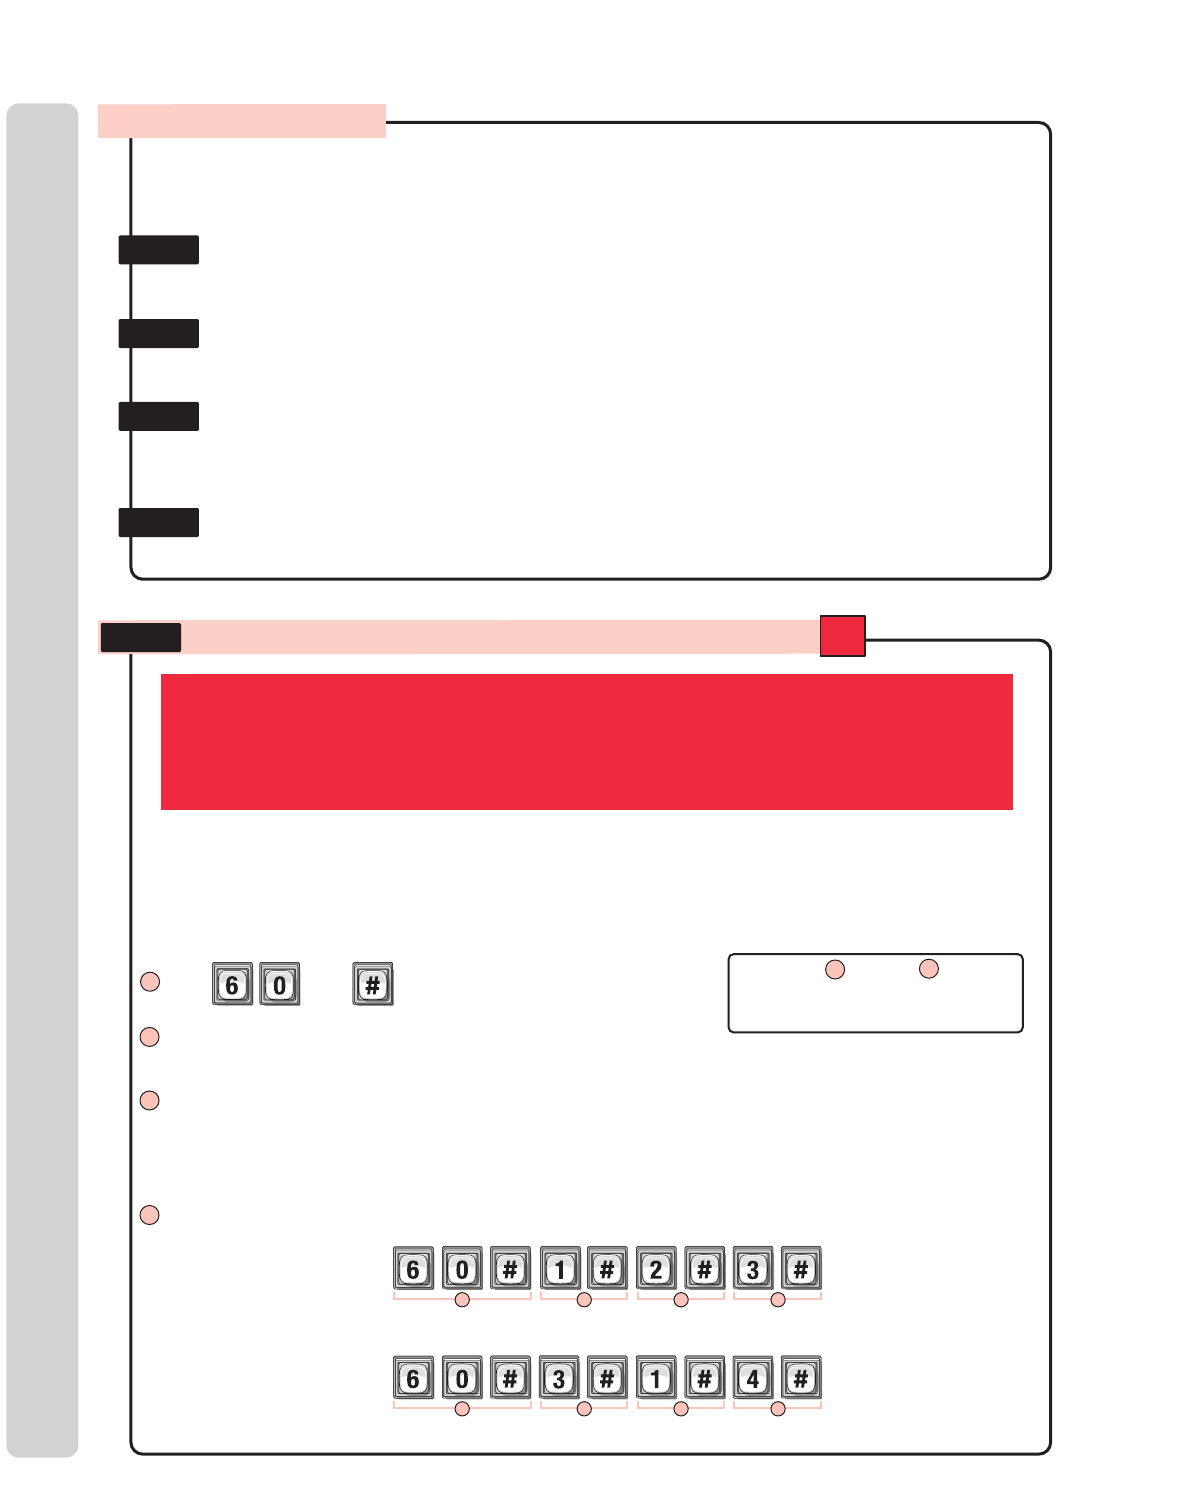
1 Press
2 Enter External Access Control Device Number (1-4). Then (
#
)
3 Enter External Access Control Device Type (0-2). Then (
#
)
4 Assign a Door Number (1-4) to the Device. Then (
#
)
The EL25 can be equipped with Wiegand reader and radio frequency (RF) modules that allow your system to
accommodate external access control devices such as a Wiegand-compatible card reader (keypad) and RF
receiver.
In order for the devices to work successfully, you must assign them a “Door Number”.
When a
valid access code is presented to the device, the
Assigned Door's Relays
will activate.
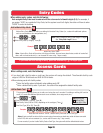
Factory Setting: EL25 Keypad Always Assigned to Door 1, No Devices Assigned - 0
Then
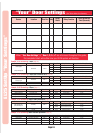
EL25 SetUp “Your Settings”
EL25 SetUp “Your Settings”
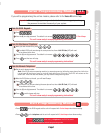
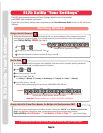
Assign Each External Access Control Device a “Door Number”:
60
Device “1” is a Radio Receiver and Assigned as Door “3”.
Example A:
1 2 3 4
Device “3” is a Card Reader or Keypad and Assigned as Door “4”.
Example B:
1 2 3 4
0 = Not Activated/No Device Assigned
1 = (Wiegand) Card Reader or Keypad Only
2 = RF Receiver
Internal Keypad is ALWAYS Assigned to External Access Control Device Number 0
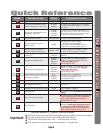
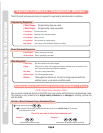
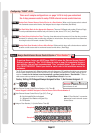
Step 1
Note:
A “Door Number” is a number
you assign to each external access
control device.
Important:
Allthroughepsmust be
performed for
EACH
external access
control device of unit.
1
4
There are 3 sample configurations on page 14-16 to help you understand
the 4 step process needed to setup YOUR external access control devices.
Configuring “YOUR” EL25