


Using your Avaya 1165E IP Deskphone
64
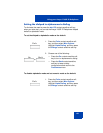
Method B:
1. Attach the 15-cm (6-inch) CAT5e cable.
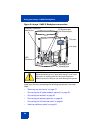
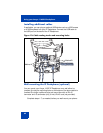
2. Position the stand over the mounting rivets, and slide the phone down
the wall so that the rivets fit into the slots on the stand, indicated in
Figure 12 on page 62 (Method B).
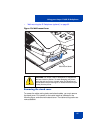
3. Replace the stand cover. Ensure that all cables are neatly routed and
press the stand cover into place until you hear a click.
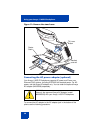
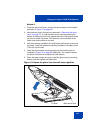
4. Put the phone in the wall-mount position (optional). If you wall-mount
your phone, put it in the wall-mount position by holding the Tilt Lever
and pressing the phone towards the base until the phone is parallel
with the base. Release the Tilt Lever and continue to push the phone
towards the base until you hear an audible click. Ensure the phone is
securely locked in position.
Attention: To add an I Expansion Module for Avaya 1100 Series IP
Deskphones, see Expansion Module for Avaya 1100 Series IP
Deskphones (SIP Firmware) User Guide (NN43110-301).
Entering text
You use can use combinations of the letters and numbers on the dialpad
of your IP Deskphone to, for example, spell names or words in Instant
Messages (IMs), enter SIP addresses, create Address Book entries, and
to designate feature key labels.
To make a call, you can dial an alphanumeric SIP address; for example,
jdoe2@domain.com.You can enter and edit text on your Avaya 1165E IP
Deskphone using the following methods:
Note: Some service providers support only the use of a Directory
Number (DN) such as 555-5555 to initiate a call to another phone.
Contact your system administrator or service provider to determine if
alphanumeric dialing is supported. Alphanumeric dialing consists of
string of text that contain letters and numbers that make up, for
example, a SIP address.