


5
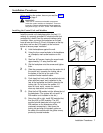
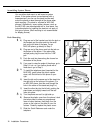
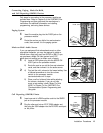
A) To replace the cover, while holding the cover at
an angle, gently move the top rear edge of
the cover over the top of the control unit and
match up the grooves where the top edge of
the cover meets the backplane. Gently push
the edge into place.
B)
Lower the bottom of the cover until it is secured
in place.
Replacing System Modules
1
A)
B)
C)
2
A)
B)
C)
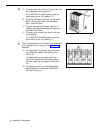
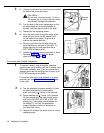
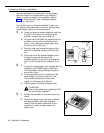
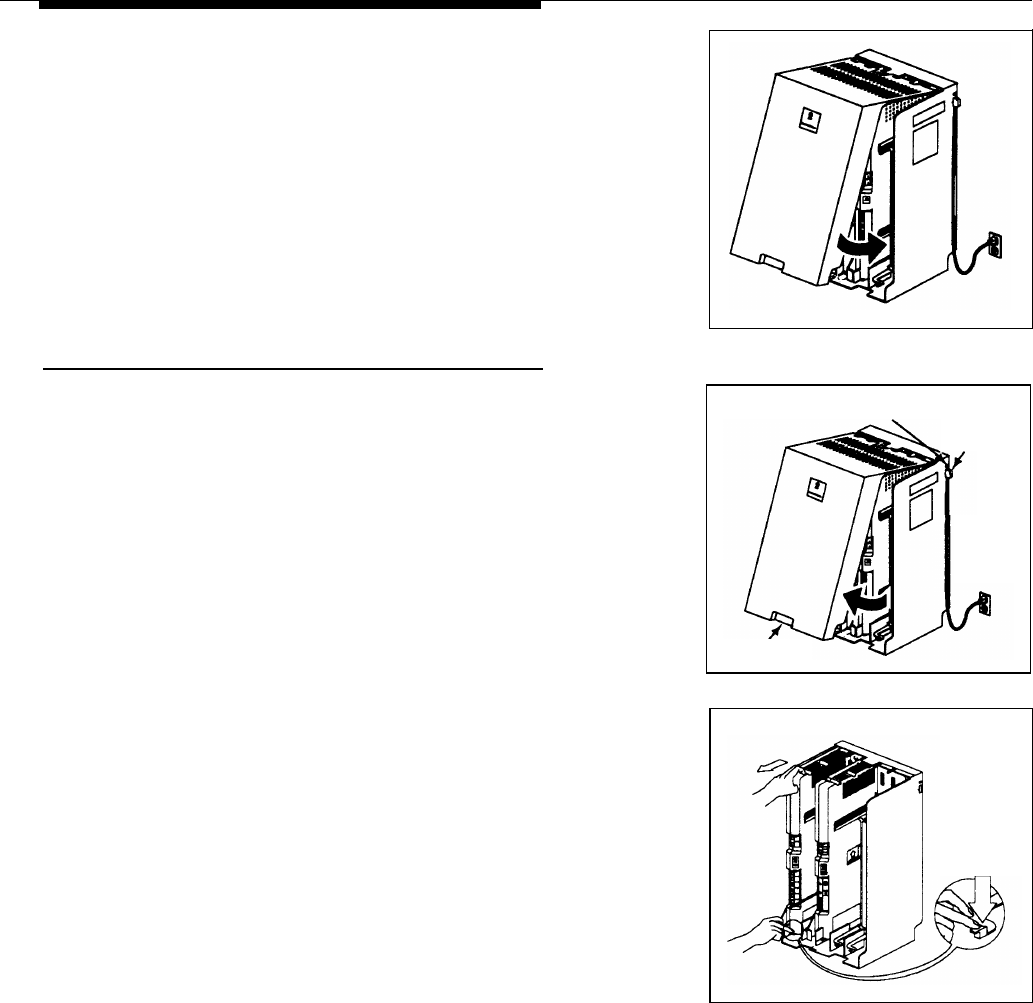
To power down the control unit, pull out the
main circuit breaker.
On a PARTNER Plus 220V system, move the
on/off switch to the “off” position (“O”).
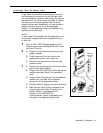
To remove the cover, place one hand on the
handle on the bottom front of the cover and
place your other hand on the top of the cover.
Gently pull the cover up from the bottom and tilt
it towards the top until it detaches from the
backplane.
Power
Jack
Handle
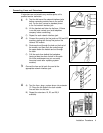
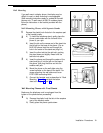
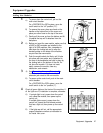
Check the slack in the wires. If there is not enough
slack to remove the module without pulling
the line and extension cords free, label and
disconnect the wires before continuing with
Step 2B.
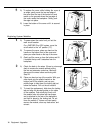
Place one hand on top of the module. With your
other hand, grip the plastic bracket on the
bottom front of the module, and use your
middle finger to hold down the locking tab just
below the bracket. Pull out the old module.
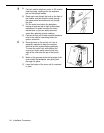
To insert the replacement, hold down the locking
Locking
Tab
tab and align the dovetail guides on the sides
of the modules. Push slowly but firmly until
the module locks into place with two snaps,
and is attached to the rear of the backplane
and held in place by the locking tab. Do not
force the module. If it does not insert easily,
remove the module, clear any obstruction, and
reinsert.
Main
Circuit Breaker
18
Equipment Upgrades