


Connecting Intercom Autodialers
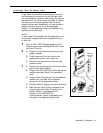
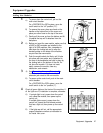
Since the autodialer has a fixed stand, you may need to
adjust the height of the system phone—by installing a
stand—to match the height of the autodialer. Refer to
Step 2 of “Desk Mounting” under “Assembling System
Phones” for instructions.
You can wall mount an Intercom Autodialer to work next
to a wall-mounted system phone; however, wall-mounting
system display phones is not recommended.
1
2
3
A)
B)
C)
D)
A)
B)
C)
A)
Power
Unit
In
Out
Wall Jack
B)
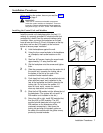
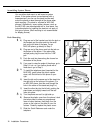
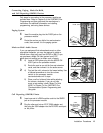
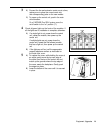
Unplug the phone’s modular telephone cord from
the jack on the bottom of the phone and the
wall jack, and save the cord for Step 1D.
Plug one end of the D8W cord, supplied with the
autodialer, into the jack on the bottom of the
phone. (If the phone has multiple jacks, plug
the cord into the “LINE” jack.)
Route the other end through the groove at the
back of the autodialer and plug it into the OUT
jack.
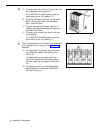
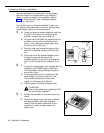
Route one end of the modular telephone cord
through the groove at the back of the
autodialer and plug it into the IN jack; plug the
other end into the wall jack for extension 10 or
11.
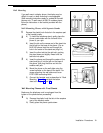
Connect the keyed power cord, supplied with the
autodialer, to the POWER jack on the bottom
of the autodialer, routing it through the groove
as you did in Step 1.
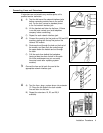
If the keyed power cord is not attached to the
power supply unit, plug the free end of the
cord into the modular jack on the power
supply unit; otherwise, go to Step 2C.
Plug the power unit into the electrical outlet.
CAUTION:
Use only the power unit supplied by AT&T
for the Intercom Autodialer.
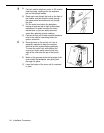
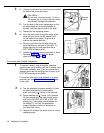
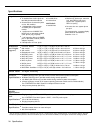
Arrange the autodialer on your desk next to the
phone.
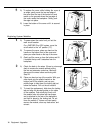
Remove the plastic cover from each autodialer
and label the button sheet with employee
names. Place the button sheet back on the
autodialer, and then carefully replace the
plastic cover.
Power
16
Installation Procedures