


I N S TA L L AT I O N
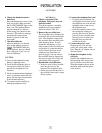
4 Set the dial mode switch.
If you have touch tone service on
your phone line, set the switch
located on the bottom of the base
to TONE. If you have rotary
service, set the switch to PULSE.
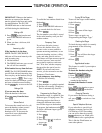
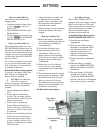
5 Install the handset battery.
• Remove the handset battery
cover by pressing the
indentation on the handset
battery cover and sliding the
cover downward.
• Place the handset battery pack
in the compartment. Make sure
the metal contacts on the under-
side of the battery are aligned
with the ch a rging contacts in the
handset bat t e ry compart m e n t .
• Replace the handset battery
cover by sliding it on its track
up and over the handset battery
compartment until it snaps
firmly in place.
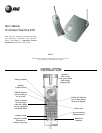
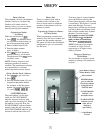
1 Setting up the Cordless
Telephone 9105.
• Choose an area near an electri-
cal outlet and a telephone jack.
• The outlet should not be
controlled by a wall switch.
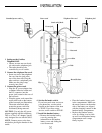
2 Connect the telephone line cord.
• Insert one end of the telephone
line cord into the jack at the
rear of the base unit. Plug the
other end into a telephone jack.
Make sure the plugs snap
securely into place.
3 Connect the power cord.
• Plug the AC power adapter into
a standard electrical outlet and
the DC connector into the
power jack located at the rear of
the base unit.
• W rap the power cord around the
s t rain relief hook on the bottom
of the base unit (see illustrat i o n ) .
The strain relief hook helps
p rotect the power cord fro m
a c c i d e n t a l ly being re m ove d.
CAUTION: Use only the AC power
adapter supplied with this telephone.
This is a Class 2 AC adapter, specifi-
cally designed for use with the 9105.
NOTE: Connect power to the base
unit before placing the handset in the
cradle.
Standard power outlet Power cord
Power jack
Telephone jackTelephone line cord
Telephone jack
Base unit
Reversible base
Thicker end
Strain relief hook
Slots
Tabs
Clips
Slots
2