


INSTALLATION
Before You Install
Choose a location for the answering
system near a modular telephone jack and
a standard electrical outlet not controlled
by a wall switch.
Use only the power cord supplied
with this product.
If you need a replacement, call
1 800 222–3111.
Input: 120 V, 60 Hz.
Output: 6V AC, 350 mA.
1
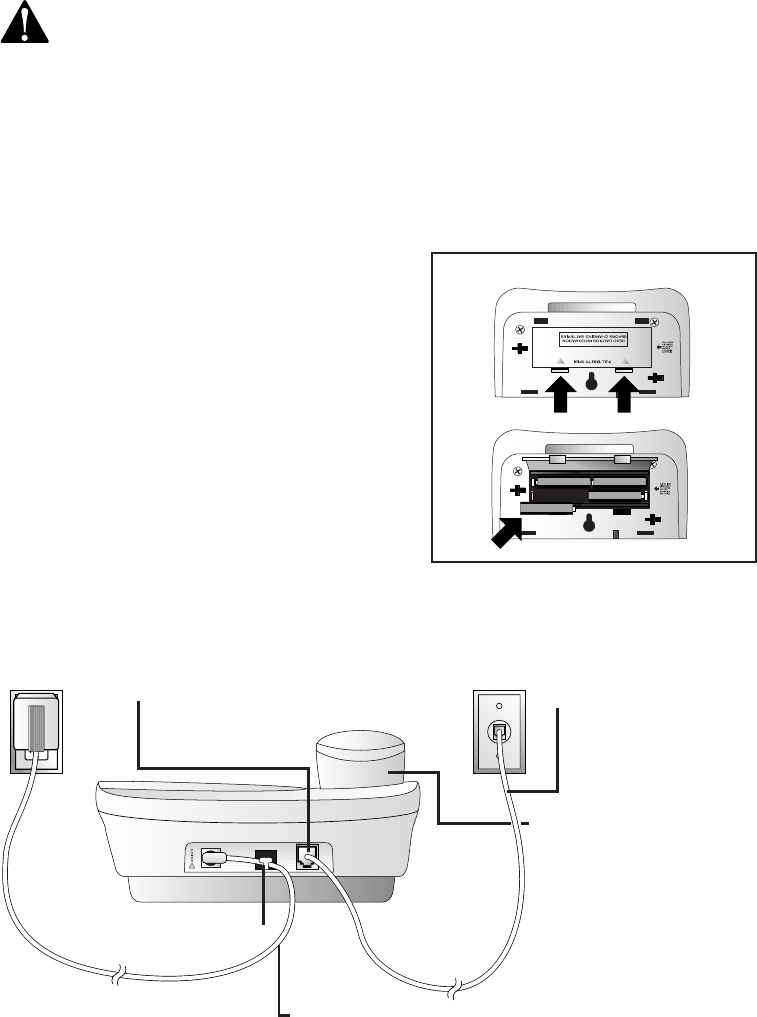
Batteries
• You should install four fresh AA alkaline
batteries in order to use this system in
case of a power failure. The batteries
are not necessary for operation other
than during a power failure.
• When battery power is low, the LOW
BATT light goes on. Replace the
batteries promptly, to be able to make
and answer calls, and receive and
access messages in a power failure.
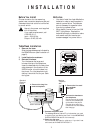
Modular
Telephone
Jack
Standard
Electrical
Outlet
Strain-relief tab
5 Connect the line cord
to a modular
wall jack.
4 Connect the long line
cord to telephone.
6 Connect the handset to
the telephone.
Plug one end of the coiled
cord into the handset jack
on the side of the phone.
Plug the other end of the
coiled cord into the handset,
then hang up.
7 Connect the power cord.
The Message Window flashes
CL to indicate that you need
to set the clock (see “Setting the Clock” in the ANSWERING
SYSTEM OPERATION section of this manual).
8 Check for dial tone.
Lift the handset and listen for a dial tone. If you don’t hear
a dial tone, see IN CASE OF DIFFICULTY.
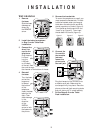
Table/Desk Installation
1 Remove the base.
Slide the base sideways as indicated by
the REMOVE arrow (see illustration on
page 2).
2 Install batteries as shown.
3 Reinstall the base.
Turn the base so the larger end
is toward the top of the telephone.
Insert the base tabs into the slots, then
slide sideways in the direction of the
INSTALL arrow to lock the base into
the phone. Turn the telephone right
side up; it should sit flat on your table
during use.
Battery Installation (optional)