Initializing the CallPilot 100/150 9
CallPilot 100/150 Quick Start Guide
16 Connect the LAN cable to the Ethernet port on the CallPilot 100/150.
You can now initialize the CallPilot parameters. For information about how to initialize the
CallPilot, refer to “Running the Quick Install Wizard” on page 9.
Changing the IP address using an Ethernet crossover cable
Using an Ethernet crossover cable, you can connect the CallPilot 100/150 to your computer. With
this connection, you can use CallPilot Manager to change the CallPilot 100/150 IP address before
you connect it to the network.
To use an Ethernet crossover cable, your computer must be equipped with a 10/100 BaseT
Ethernet card and support TCP/IP protocol.
Connecting the Ethernet crossover cable
1 Shut down the computer.
2 Attach one end of the Ethernet crossover cable to the Ethernet port on the CallPilot 100/150.
3 Connect the other end of the cable to the network interface card on your computer.
4 Start the computer.
5 Use the Quick Install Wizard to initialize the CallPilot 100/150.
For information about how to use the Quick Install Wizard, refer to “Running the Quick Install
Wizard” on page 9.
Running the Quick Install Wizard
The Quick Install Wizard appears the first time you startup CallPilot Manager. The Quick Install
Wizard is a single page that gathers enough information to set up a working system. It then applies
the information and restarts the system.
You can reach CallPilot Manager from another computer through a LAN connection, WAN/
Internet connection or an Ethernet crossover cable. All of these methods create an IP connection
that allows you to run CallPilot Manager.
Use the following procedure to run the Quick Install Wizard:
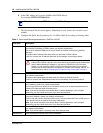
1 Launch your browser.
Note: If you do not have access to the CallPilot 100/150 through the network, you can use
an Ethernet crossover cable to configure all of the CallPilot 100/150 parameters.


