


CH. 4 (CONT)
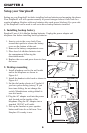
3. Wall mounting
a. Install wall mounting plate as shown in Figure 4.3
b. Take the handset hook out and flip it to reverse position as shown in Figure 4.7. It
will hold the handset when the phone is in a vertical position.
c. Use the provided 6 inch modular cord to mount the phone as shown Figure 4.8.
d. Repeat step 3 through 6 of Desktop mounting section to complete the setup.
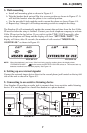
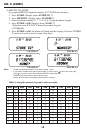
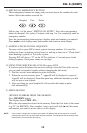
The Starplus-45 will automatically update the current date and time from the first Caller
ID received after the setup is finished. Contact your local telephone company to activate
Caller ID service the day before. If you wish to set the TIME / DATE manually, after
setup, the telephone will beep and the display will show “SET TIME / DATE.” The
display will show, after 10 seconds, the number of calls received “MISSED -00-,
ANSWER -00-” as shown in Figure 4.5.
NOTE: When the telephone is not in use, if the line is being used by another phone, the display shows
“EXTENSION IN USE”.. on the screen and BATTERY LOW LED comes on. This means back up
batteries are either low or not fitted properly. See Figure 4.6.
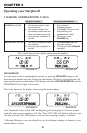
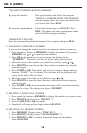
4. Setting up an external signaler
Connect the external ringer device direct to the second phone jack located on the top left
side of the unit as shown in Figure 4.9.
5. Connecting to an assistive listening device
Your Starplus-45 provides an audio jack to connect direct to an assistive audio listening
device. It is not designed for a hands-free headset or a phone headset.
7
FIGURE 4.5 FIGURE 4.6
FIGURE 4.7 FIGURE 4.8
FIGURE 4.9
phone jack phone signaler