32
|
KCA-BT300
Accessories/ Installation Procedure
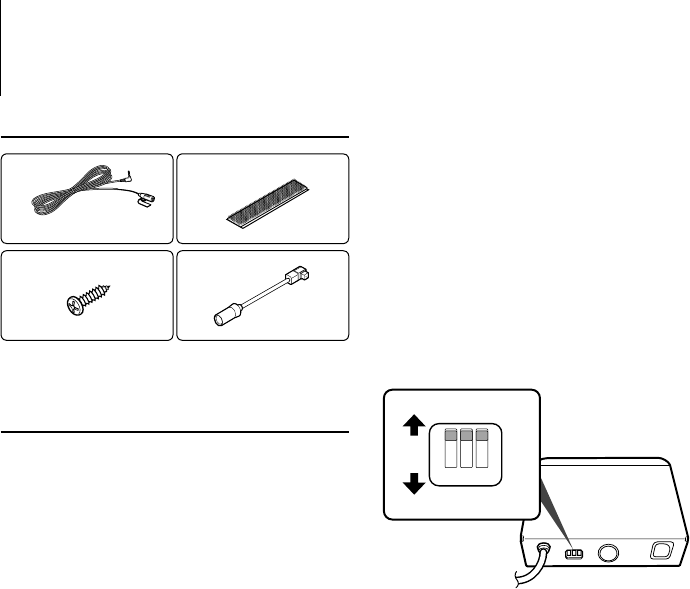
Accessories
1
3 m (9.5 ft) ..........1
3
..........1
2
..........2
4
..........1
Installation Procedure
1. To prevent a short circuit, remove the key from the
ignition and disconnect the - battery.
2. Set the Type switch.
3. Make the proper input and output wire
connections for each unit.
4. Install the unit in your car.
5. Reconnect the - battery.
6. Press the reset button on the control unit.
¤
• Insulate unconnected wires with vinyl tape or other similar
material. To prevent a short circuit, do not remove the caps
on the ends of the unconnected wires or the terminals.
• After the unit is installed, check whether the brake lamps,
blinkers, wipers, etc. on the car are working properly.
For Good Reception
To assure good reception, note the following:
• Communicate with the cell-phone within the line-
of-sight distance of 10 m (30 ft). The communication
range becomes shorter depending on the
surrounding environment. The communication
range also becomes shorter when there is an
obstacle between this unit and the cell-phone. The
above maximum communication range (10 m) is
not always assured.
• Keep this unit away from other electric components
(AV components) as far as possible. If they are near,
call connection can fail, TV or radio noise can be
generated, or poor reception can occur.
• A broadcast station or walkie-talkie located nearby
can interfere with communication due to too strong
signal.
Setting the Type Switch
Set the Type switch according to the type of the
control unit connected. See the Type switch setting
column of the model list (page 4).
For the models released after April 2010, set the Type
switch as follows.
- For the model connected with the 5L connector
1: OFF, 2: OFF, 3: OFF
- For the model connected with the KAB connector
1: OFF, 2: ON, 3: OFF
- For more details, see the following web site. Set the
Type switch according to the web site when the
above setting is different from that of the web site.
www.kenwood.com/cs/ce/bt/
1
OFF
ON
23
1: Display Character Conversion Function
When the control unit cannot display accent characters
("u", "a", etc.), it converts these characters to upper-case
alphabetic characters.
OFF: Do not covert characters.
ON: Convert characters.
2: Specifying the Connector to Connect
Specify the type of the connector to be connected to the
control unit.
OFF: Use the 5L connector.
ON: Use the KAB connector.
3: Specifying the Control Unit Type
Specify the type of the control unit to connect to.
OFF: Set when no control unit type is specified in Model list,
or the control unit type is not in the model list.
ON: Set when the control unit type is specified in Model list.


