


12
GE 2 9892 5 x 7 08/2/94 BOOKS folder
FONTS: Helvetica, Helvetica Bold, Century Schoolbook
INSTALLATION – WALL MOUNT (optional)
•
•
•
•
•
•
•
•
•
•
•
•
•
•
•
•
•
•
•
•
•
•
•
•
•
•
•
•
•
•
•
•
•
•
•
•
•
•
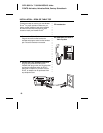
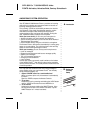
1.
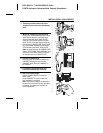
Reverse the Handset Hook
Firmly slide the
HANDSET HOOK
out of
the
CRADLE
. Rotate it 180° and slide it
back into the
CRADLE
.
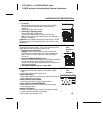
2.
Remove the Base Plate
For wall mount installations, press in the
two tabs and pull the
BASE PLATE
from
the back of the telephone.
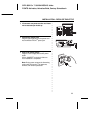
Note: For future reference, please copy
your three digit security code located on
the bottom of the unit.
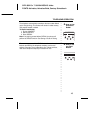
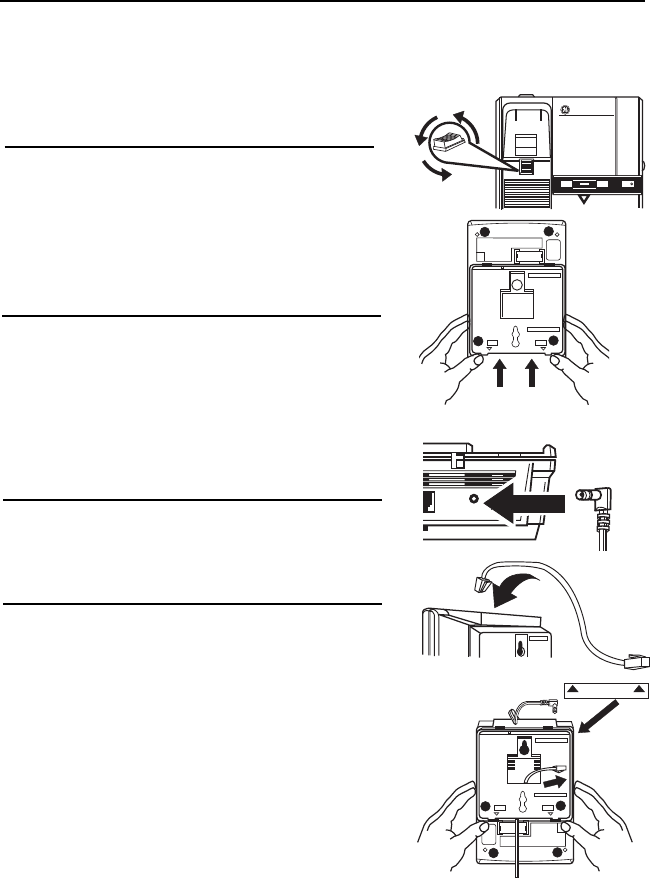
3.
Connect the Power Cord
Insert the right angle plug of the
POWER
CORD
into the
POWER JACK
on the back of
the telephone. Let the
POWER CORD
run
down the center of the telephone back.
Note: Do
not
plug
POWER SUPPLY
into wall
outlet until all other steps are completed.
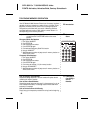
4.
Connect the Short Telephone Line Cord
Plug either end of the
SHORT TELEPHONE
LINE CORD
into the
PHONE LINE JACK
on
the back of the telephone.
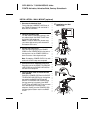
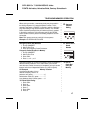
5.
Install the Base Plate so that the Arrows
Face Upward
Position the
POWER CORD
and the
SHORT
TELEPHONE LINE CORD
to run through the
top notch in the
BASE PLATE
. Feed the
SHORT TELEPHONE LINE CORD
through
the large opening in the back of the
BASE
PLATE
. Snap the
BASE PLATE
into the lower
set of tab openings in the base of the
telephone, making sure the
POWER CORD
runs through the bottom notch in the
BASE
PLATE.
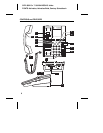
C. Installation for Wall
Mount Use
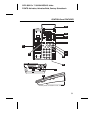
ANSWERPHONE
VOICE TIME/DAY STAMP
MEMO MESSAGE RESET PLAY•STOP ANSWER ON/OFF
THIS END UP FOR DESK USE
PUSH TO
RELEASE
PUSH TO
RELEASE
THIS END UP FOR WALL USE
PRESS
IN TABS
NE LINE
POWER VDC
THIS END UP
FOR WALL MOUNT
THIS END UP FOR DESK USE
PUSH TO
RELEASE
PUSH TO
RELEASE
THIS END UP FOR WALL USE