1-1
1. MOUNTING
NOTICE
Do not apply paint, anti-corrosive sealant
or contact spray to coating or plastic
parts of the equipment.
Those items contain organic solvents that
can damage coating and plastic parts,
especially plastic connectors.
1.1 Control Unit
1.1.1 Mounting methods
The control unit can be mounted one of four ways;
• In the hanger (overhead, bulkhead or tabletop)
• Flush mounting.
1.1.2 Mounting considerations
• Make sure the location is strong enough to support the unit under the conditions of
continued vibration and shock normally encountered on the boat
• Locate the unit where it is easily accessible and does not interfere with personnel or
operation of other equipment; for example, ship’s wheel.
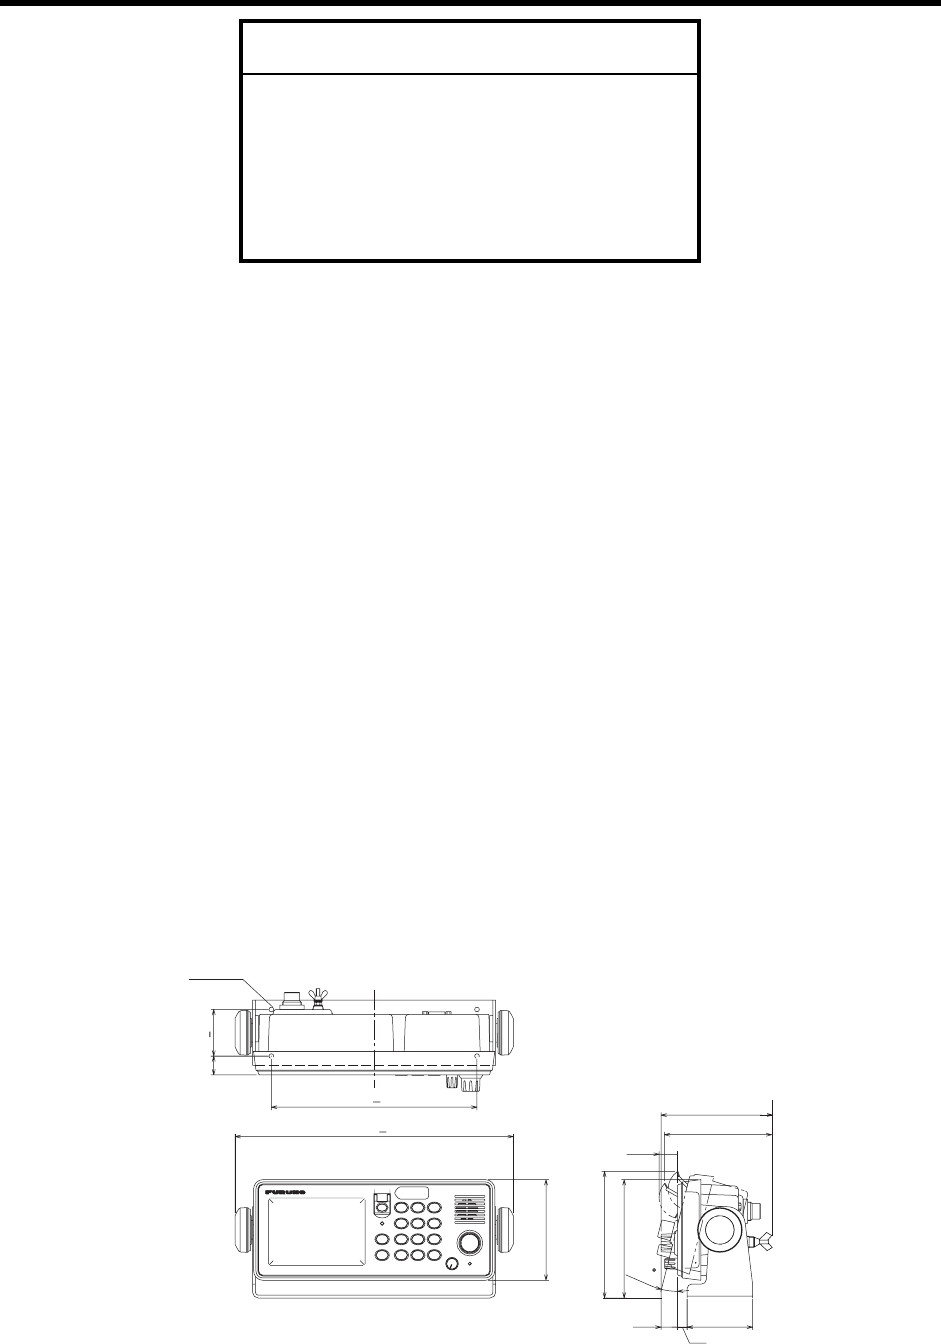
1.1.3 Hanger mounting
1. Fix the hanger with tapping screws (supplied).
2. Set the control unit to the hanger and fix it with the washers and knobs.
Fixing hole
4-φ5
127
(136)
108
110
298+4
14
70
10
50+0.520
220+0.5
93
20
18
CH
#
SETUP
9
WXYZ
6
SCAN
MNO
3
TEST
DEF
TUNE
0
LOG
8
TUV
PRINT
5
ACK/SQ
JKL
2
DSC
ABC
CURSOR
FILE
*
7
PQRS
4
IntCom
GHI
RT
1
CALL
CANCEL
DISTRESS
PUSH TO ENTER
PWR/VOL
OFF
OVEN
ALARM


