


51, 52, 53, 54 Series II
Service Manual
10
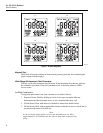
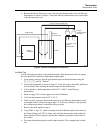
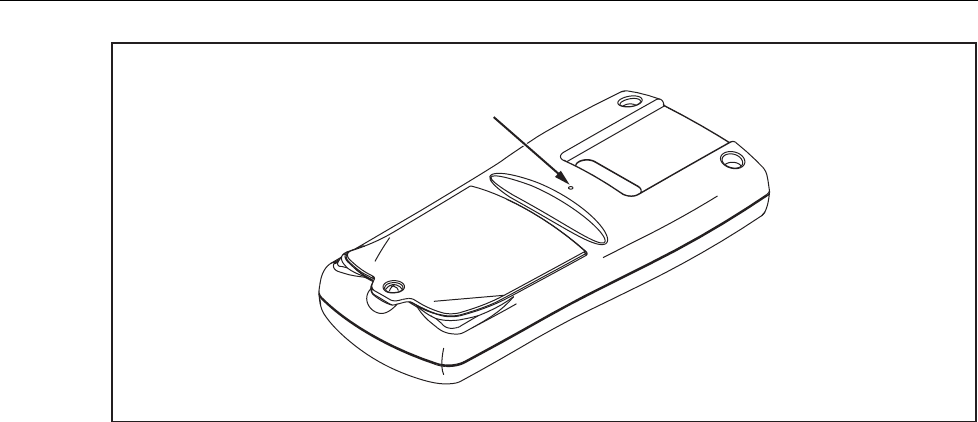
Calibration
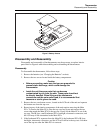
button access
zb02f.eps
Figure 4. Calibration Button Access
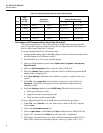
3. The menu on the display changes to “CAL A-d”.
Note
Within
CAL
are four menu options that may be accessed by pressing E:
•
CAL A-d
prompts the operator for the A/D calibration inputs in mV dc.
•
CAL rEF
allows the operator to calibrate the reference junction at a
known temperature.
•
CAL donE
saves the new calibration constants in memory.
•
CAL Abrt
ignores calibration changes (turning the thermometer off
while in
CAL
will also ignore calibration changes).
4. Press K or N to select different menu options.
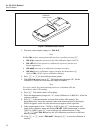
5. With
CAL A-d selected, press E. The thermometer prompts “80”. Set the
calibrator to +80.000 mV and allow the output to stabilize.
Note
For steps 6 and 8, keep hand and body motion to a minimum while the
thermometer takes A/D readings.
6. Press E. Wait while it takes A/D readings.
7. When the thermometer prompts for “-8”, set the Calibrator to -8.0000 mV. Allow the
output to stabilize.
8. Press E on the thermometer and wait while it takes A/D readings. The
thermometer now shows the measured value in the bottom portion of the display.
Millivolts appears on the left side and microvolts appears on the right side.
9. If the measurement is from –7 995.0 to –8 005.0, press E and the meter will
return to the calibration menu and display
CAL rEF. If the measurement is outside –
7995.0 to –8005.0, press E once to return to the calibration menu. Using
K or N, select
CAL A-d and try the A/D calibration procedure a second time
starting at step 5.
10. Using K or N, select “
CAL donE”, then press E to store the calibration in
memory.