9
INSTALLATION
BOX CONTENTS
Verify that the following items are in the box.
• Telephone
• Handset
• Handset Cord
• Line Cord
• 3 AA Batteries
• Power Adapter
• Instruction Manual
BATTERY INSTALLATION
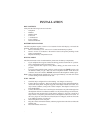
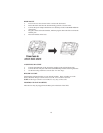
The 9225 telephone requires 3 AA size 1.5 V batteries for the LCD display. To install the
batteries, follow the steps below:
1. Remove the battery cover. The cover is located underneath your phone.
2. Insert 3 AA size 1.5 V batteries. Be careful to observe the polarity markings in the
battery compartment.
3. Replace the battery compartment cover.
DIALING MODE
The 9225 dial mode switch is underneath the phone near the battery compartment.
• If your telephone line supports touch-tone dialing, put the switch in the “T” position.
This is the default postion from the factory.
• If your telephone line requires rotary (Pulse) dialing, put the switch in the “P”
position.
• If you are unsure which system you have, set the switch to the TONE position. Lift
the handset. When you get a dial tone, dial a telephone number. If the dial tone
continues, move the switch to PULSE, and then dial the telephone number again.
Note: When in PULSE mode, holding the * key for approximately 3 seconds will switch
to Tone dialing for the duration of the call.
WALL MOUNT
1. The 9225 ships configured for wall mounting. No changes are necessry.
2. Connect the power adapter. The power adapter connects to the jack marked DC 9V
on the back of the phone. Plug the large part of the adapter into the wall outlet. Use
only a 9V DC. 300mA, center positive Class 2 adapter. The adapter is necessary for
LCD backlighting.
3. Connect the line cords. Lines 1 and 2 may be connected to one jack and brought into
the telephone with one 4 conductor modular cord. If you have this type of connection,
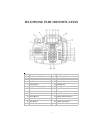
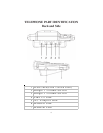
plug the line cord into the Line 1/2 jack (Item 4 on Page 8) Also Line 1 and Line 2
may connect to 2 separate jacks and connect to the telephone with two line cords. In
this case, plug Line 1 into the Line 1/2 Jack (Item 4 on Page 8) and Line 2 into the
Line 2/Data jack (Item 1 on Page 8) .
4. Mount the phone on the wall jack.
5. Plug the coiled cord into the handset, and then plug the other end of the cord into the
handset jack.
6. Place the handset on the base
.


