Transmitter Controls And Functions (Continued)
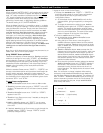
To load (recall) a Preset:
1. Touch the Set button once to move to Menu mode. (The
window changes to frequency, if Name had been displayed.)
2.
Touch the Up arrow twice to move to “PRESET” in the LCD
window.
3.
Touch the Set button once. “LOAD” (or “STORE”) appears
in the LCD.
4. If needed,
touch the Up or Down arrow once, to change the
selection to “
LOAD.”
5.
Hold the Set button until “
LOAD
xxxxxx” (the current Preset)
appears in the LCD.
6.
Touch the Up or Down arrow to change the selection from
“
xxxxxx” to the desired Preset.
7.
Hold the Set button until “LOADED” appears briefly in the
LCD. The transmitter reverts to normal operation with the
selected preset’s settings loaded. To toggle between
transmitter name and frequency,
touch an Up or Down
arrow button.
To revert to factory-default values:
1. Touch the Set button once to move to Menu mode.
2.
T
ouch
the Up ar
row twice. “
PRESET” shows in the LCD
window.
3.
Touch the Set button once. “LOAD” (or “STORE”) appears
in the LCD.
4.
Touch the Up or Down arrow once, if needed, to change the
selection to “
LOAD.”
5.
Hold the Set button. The current Preset appears in the LCD.
6.
Touch the Up or Down arrow buttons to cycle through the
available choices until “DEF” appears in the display.
7.
Hold the Set button to load the factor
y default settings.
“LOADED” appears briefly in the LCD. The transmitter
reverts to normal operation at the default settings.
Preset/Default Settings
A “PRESET” selection in the menu per
mits the storing of up to
five different user-definable configurations. Customized names,
using letters, numbers and symbols, can also be created and
stored for Presets 1–5. In addition, a Default (“
DEF”) choice
permits returning all transmitter functions to their factory-
default settings.
To store Preset configurations:
1. Touch the Set button once to move to Menu mode.
2.
Touch the Up arrow twice to move to “PRESET” in the LCD
window.
3.
Touch the Set button once and “LOAD” (or “STORE”) will
appear in the LCD.
4.
Touch the Up or Down arrow once, if needed, to change the
selection to “
STORE”.
5.
Hold the Set button until “STORE” changes to
“
PRSET1” (or the name of the cur
rently loaded Preset).
6. If desired,
touch the Up or Down arrow to cycle through the
available choices: “
PRSET1” through “PRSET5” (or their
previously changed names).
7. Accept or enter a name for the Preset:
a. To accept the
standard name (PRSET1 – PRSET5, or the
previously stored name) for a new Preset configuration
and to update (overwrite) any previously stored
configuration choices:
a1. At the desired Preset,
hold the Set button until the first
character blinks.
a2.
Hold the Set button again until “STORED” appears in
the window. This stores the standard Preset name with
the associated function choices and returns the
transmitter to normal operation.
b.To enter a
custom name for a Preset:
b1. At the desired Preset,
hold the Set button until the first
character blinks.
b2. Using the Up or Down arrow, move through the
available characters (see box below) until the desired
character is r
eached.
T
ouch
an ar
r
ow button for single
steps, or hold it down to scroll through the characters
at increasing speed.
b3.
Touch the Set button once to accept the first character
and move to the second character, which now is
blinking. Use an Up/Down arrow to find the desired
second character;
touch the Set button once to accept
it and move to the third position. Repeat this selection
pr
ocess until the character for the sixth position has
been selected. (It is not necessar
y to change or step
through all six characters before storing the result. At
any point in the pr
ocess, simply
hold the Set button
until “
STORED” appears in the window
.)
b4. Once the sixth character has been selected as desired,
hold the Set button until “STORED” appears in the
window. This stores the custom Name with the
associated function choices and returns the transmitter
to normal operation.
Note: If a correction or change is desired while entering
characters, simply
touch the Set button once when the
sixth (last) character has been r
eached. The window will
flash “
ESCAPE.” Touching the Set button once more will
start the name-entry process over at the first character.
(To leave any characters as they are, simply
touch the Set
button once to skip over them.)
20
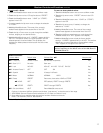
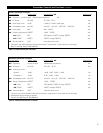
Available transmitter Name character choices (listed in the
Up-arrow direction):
A …through… Z,
__ (underscore) … (
space),
[ (
left bracket) … ] (right bracket),
* … + … -- … /,
0 …through… 9,
| … < … > … ?
Note: Loading the default settings resets the transmitter
frequency to the default value of 541.500 (Band C) or
655.500 (Band D).


