4
English Français
Nederlands
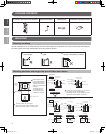
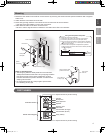
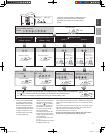
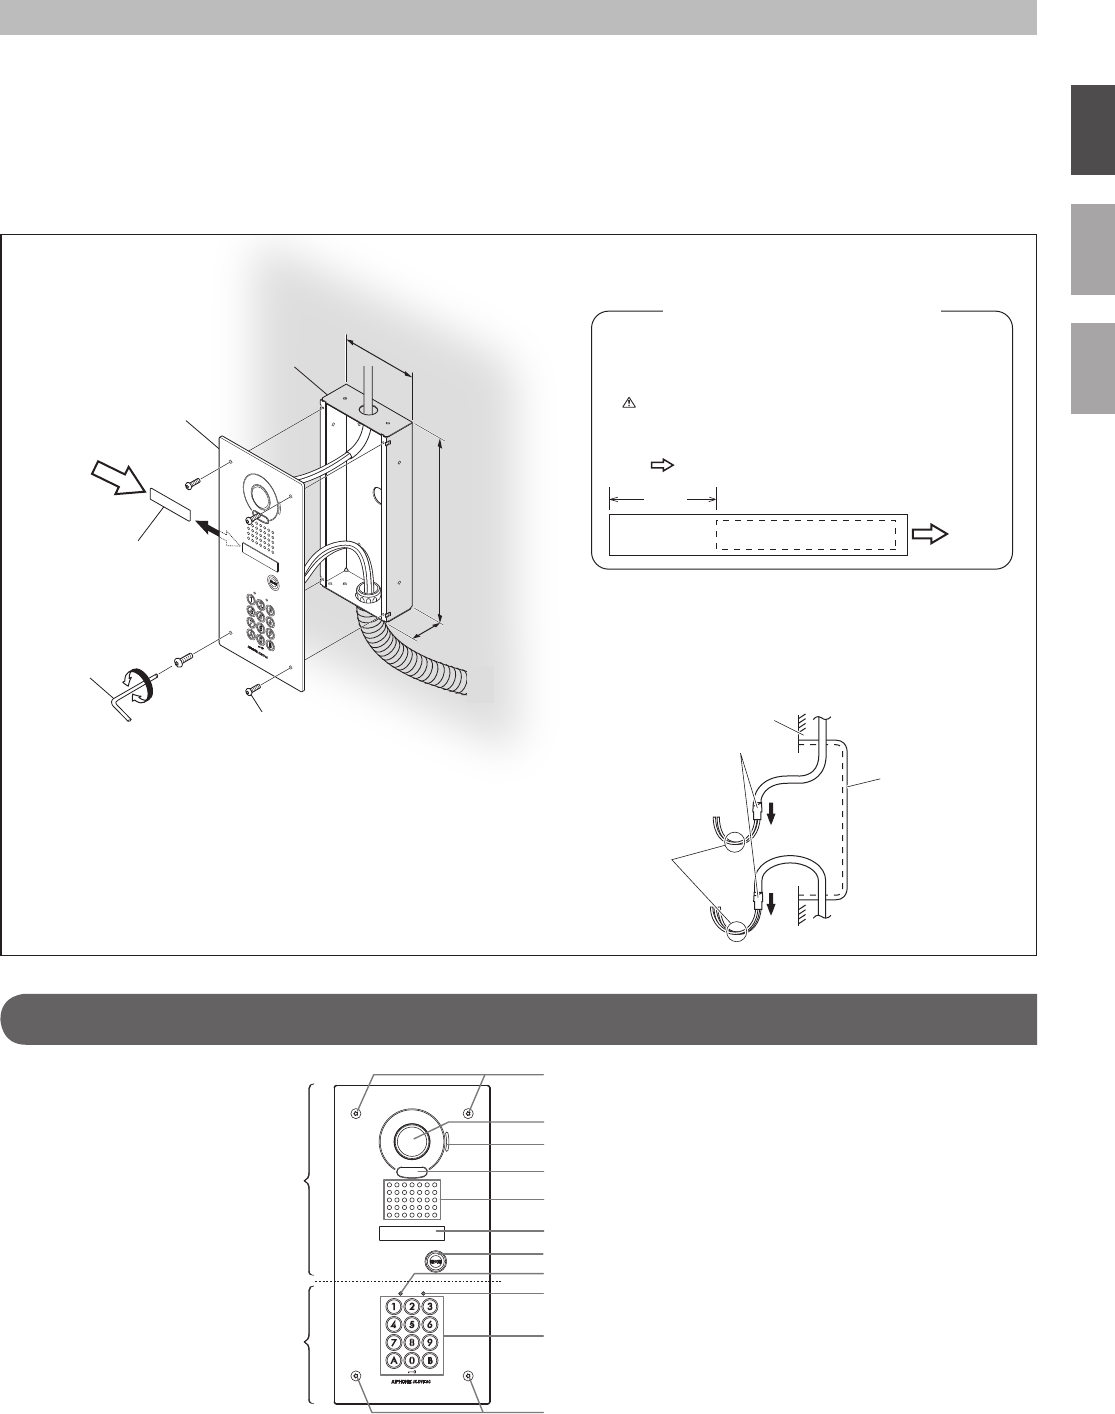
Special screws for panel mounting
Camera
Microphone
WhitelightLED
Speaker
Directory card
Call button
LEDindicator(Orange)
LEDindicator(Green)
Keys(Yellow)
Special screws for panel mounting
45 mm
(1-3/4")
263 mm
(10-3/8")
114 mm
(4-1/2")
ABC
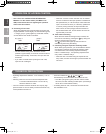
1.Detachthedoorstationfromtheushmountbackboxbyremovingthescrewswiththespecialscrewdriverthatissupplied
with the unit.
2.Attachtheushmountbackboxtothewall.
3.Routewiringthroughtheushmountbackboxandconnectwirestothedoorstation.
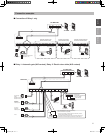
* See page 5 and 6 for details on wiring and connections.
4.Attachthedoorstationtotheushmountbackbox.
*
Besuretousetheoriginalscrewstoreattachthedoorstationtotheushmountbackbox.
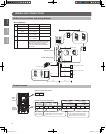
Notes on handling wires
l
Afterstrippingbackthecablejacketfromtheconductors,
waterproof the area that has been cut by wrapping insulation
tapearoundtheendofthejacket.Additionally,position
the cable downward to prevent rainwater or moisture from
seeping into the cable.
l
Do not bend the wires at a sharp angle to prevent them
frombreakingastheyage.
Flushmountbackbox
Door station
Transparent
nameplate
Special
screwdriver
Specialscrews(4pcs)
Do not bend at
a sharp angle.
Loosen
Tighten
Flush mount
backbox
Areas where the cable
jacketwasremoved
Wall
To
insertion
opening
Using the transparent nameplates
Inserting the transparent nameplates
1
Removethedoorstationfromtheushmountbackbox.
2
Peelofftheprotectivesealsontheplate(bothsides).
3
Fill in the name of the resident on the transparent nameplate.
Besuretoleave25mm(1")ofwhitespaceontheleftend
to account for insertion.
4
Insertthelled-intransparentnameplateatthespecied
insertionopeningontherearsideofthedoorstation(indicated
with
indiagram).
25 mm
(1")
Video door station
Access control keypad
PART NAMES
Mounting
JK-DVF-AC_ENG.indd 4 2009/10/05 21:18:35


