


3
For more information about connecting
your phone, refer to the Aastra 9133i
Installation Guide under the section
“Connecting to the Network and to Power”.
Check with your system administrator for
assistance.
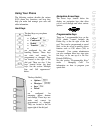
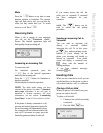
Setting Your Options
Pressing the
button gives you a list
of configurable options.
The first seven options allow you to
customize your phone settings. For more
information, see the section “Customizing
Your Phone” in the Aastra 9133i
Installation Guide included with your
phone.
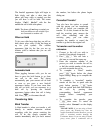
01
02
03
04
05
06
07
08
09
10
Language
Time and Date
Set Ring Tone
Clear Msg. Wtg.
Contrast Level
Live Dialpad
Headset Settings
Network Settings
SIP Settings
Phone Status
Options 8 and 9 are generally considered to
be administrator level options, and require
a password to access. The Default setting
under option 10 Phone Status also requires
a password. Some options should only be
set up or changed by your system
administrator. For more information, refer
to the 9133i Installation Guide or contact
your system administrator.
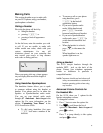
Restarting Your Phone
You may want to restart your phone to
check for updates for your phone on the
server. You may occasionally need to
restart your phone to set changes or updates
to your phone or network settings. You
may also need to restart your phone if you
have been asked to do so by your system
administrator, or should you experience any
unexpected behaviour.
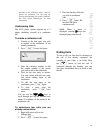
To restart your phone:
1. Press
to enter the
Options list.
2. There are two ways you can
access your options list:
a) Use to scroll down the
list of options to 10.Phone
Status and press to select,
or
b) You can press 0 to jump
directly to this option.
3. Press to move to the 4.
Restart Phone option,
or
You can press 4 to jump
directly to this option.
4. Press # to confirm and restart
the phone. If you do not wish to
restart your phone, press to
cancel.
NOTE: Your phone will be out of
service temporarily during the restart
and downloading process.
You can also restart your phone through the
Aastra Web Client. See the section
“Accessing the Web Client” in this guide
for more details.
Setting Your Options