ND-20292
CHAPTER 2
APRIL, 1990
Install the wall mounting metal brackets as shown in
Figure 200-11, using the four locally provided
fasteners.
Using the open slots provided on the back panel of the
CCU, mount the CCU to the knobs of the upper bracket
and onto the base panel.
Ensure the upper bracket
knobs are fully seated within the open slots of the
CCU. Tighten the screws from above the CCU to
securely attach the CCU to the upper bracket knobs,
install the two screws shown in Figure 200-12.
I. Install the top panel onto the top CCU and secure
with the screws removed in step C.
240.3 NOTES FOR ETU INSTALLATION
A. To prevent accidental damage to equipment, it is
recommended that power be
OFF
during
installation and maintenance, unless this will
seriously inconvenience the user.
B. The ETUs used in this system make extensive use
of CMOS technology.
Extreme care must be
taken to avoid static discharge when
handling ETUs.
C. A switch is provided on the interface ETUs to
protect circuitry from any damage during
installation with system power ON.
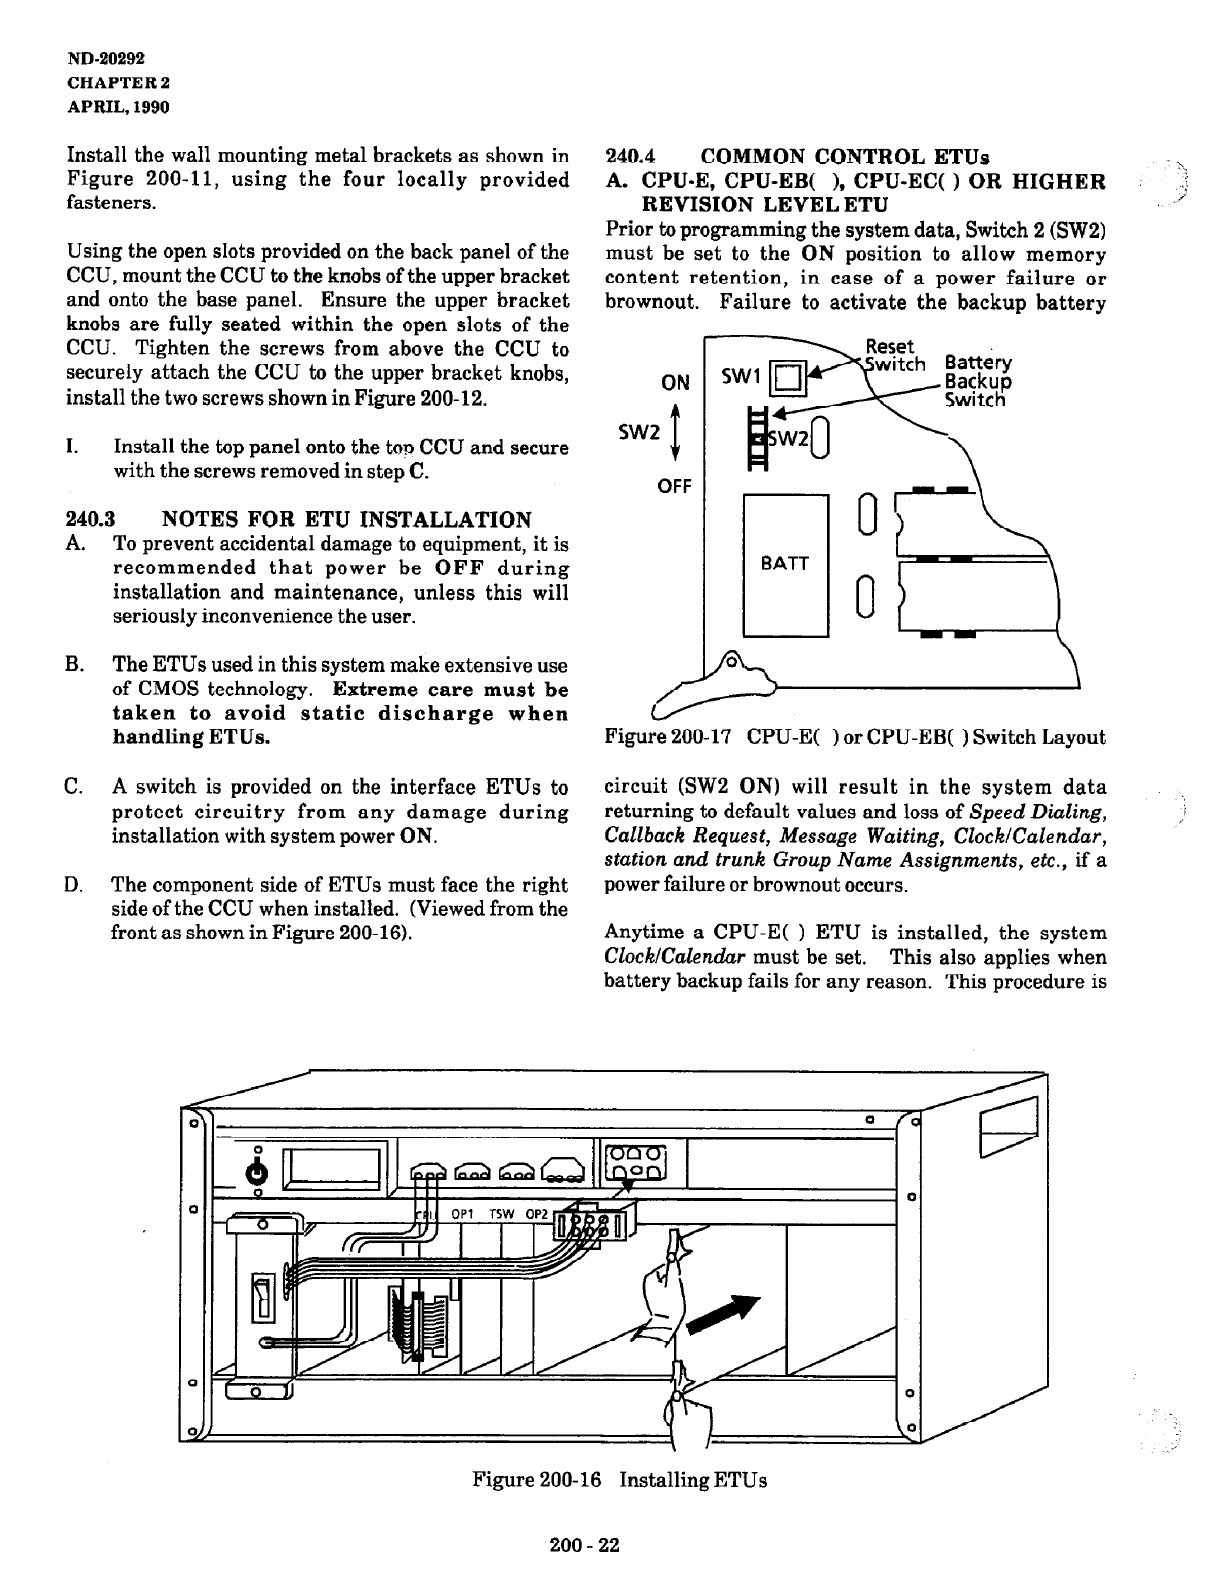
D. The component side of ETUs must face the right
side of the CCU when installed. (Viewed from the
front as shown in Figure 200-16).
240.4
COMMON CONTROL ETUs
A. CPU-E, CPU-EB(
), CPU-EC( ) OR HIGHER : 3
REVISION LEVEL ETU
2
Prior to programming the system data, Switch 2 (SW2)
must be set to the ON position to allow memory
content retention, in case of a power failure or
brownout. Failure to activate the backup battery
OFF
Figure 200-17 CPU-E( ) or CPU-EB( ) Switch Layout
circuit (SW2 ON) will result in the system data
returning to default values and loss of Speed Dialing,
Callback Request, Message Waiting, Clock/Calendar,
station and trunk Group Name Assignments, etc., if
a
power failure or brownout occurs.
Anytime a CPU-E( ) ETU is installed, the system
CZockK!ulendar must be set. This also applies when
battery backup fails for any reason. This procedure is
Figure 200-16 Installing ETUs
200 - 22
