


Sheet 2
1) Installing the Phone
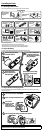
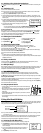
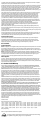
1-1. Choosing the Best Location
To get the best performance out of your new phone, put it in the best location:
Near an AC outlet
and a telephone
wall jack.
• Microwave ovens
• Refrigerators
• Fluorescent
lighting
• Dust
• Excessive
moisture
• Other cordless
telephones
In a
centrally-located
open area.
PLACE YOUR BASE
• TVs
• Other electronics
• Direct sunlight
• Extreme temperatures
• Personal computers
• Wireless LAN
equipment
• Dust
• Excessive
moisture
• Areas with
a lot of
background
noise
• Shock
• Vibration
• Shock
• Vibration
TRY TO AVOID
Notes: For maximum range
Keep both the base and handset antennas free of obstruction.
When the handset is not in use, place the handset in an upright position.
Metal and reinforced concrete may aect cordless telephone performance.
•
•
•
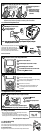
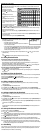
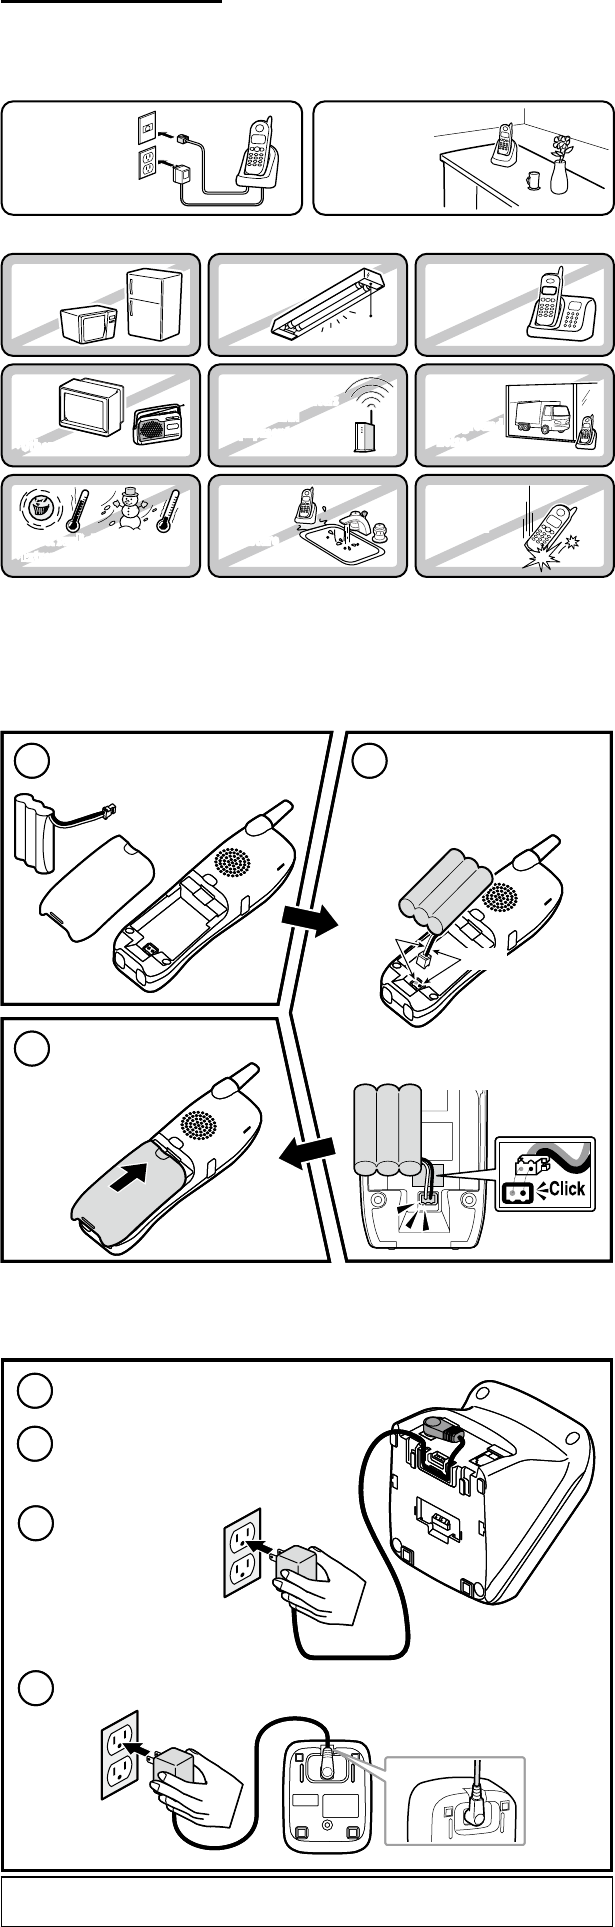
1-2. Plug in the Battery
Use only the Uniden BT-905 rechargeable battery pack supplied with your phone.
1
Locate the battery packs, battery
covers and the handsets.
2
Line up the red and black wires
on the battery pack connector
with the sticker in the handset's
battery compartment.
3
Place the cover over the
battery compartment and
slide it up into place.
Push the battery connector in firmly.
(You should hear it click into place.)
Red
Black
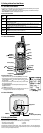
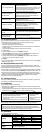
1-3. Plug in the Base and Charging Cradle
You can put the charging cradles for additional handsets anywhere they can get power. They do not have to
connect to a phone line.
Don’t put any power cord where people might trip over it or step on it. If a power cord becomes
chafed or worn out, it can create a re or electrical hazard.
4
Connect the base's AC adapter to the DC IN 9V jack.
Route the cord through the molded wiring channel.
6
5
Connect the base's
AC adapter to a standard
120V AC wall outlet.
DO NOT use an AC outlet
controlled by a wall switch.
7
Connect the charging cradle's AC adapter to a standard 120V AC wall outlet.
Route the cord
To AC outlet
AC adapter
(supplied)
To AC outlet
AC adapter
(supplied)
To DC IN 9V