


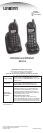
Sheet 4
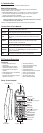
Installing the Base and Charger
Note: Use only the supplied AD-0001 AC adapter for the base and
AD-310 or AD-1010 for the charger. Do not use any other AC adapter.
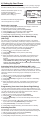
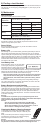
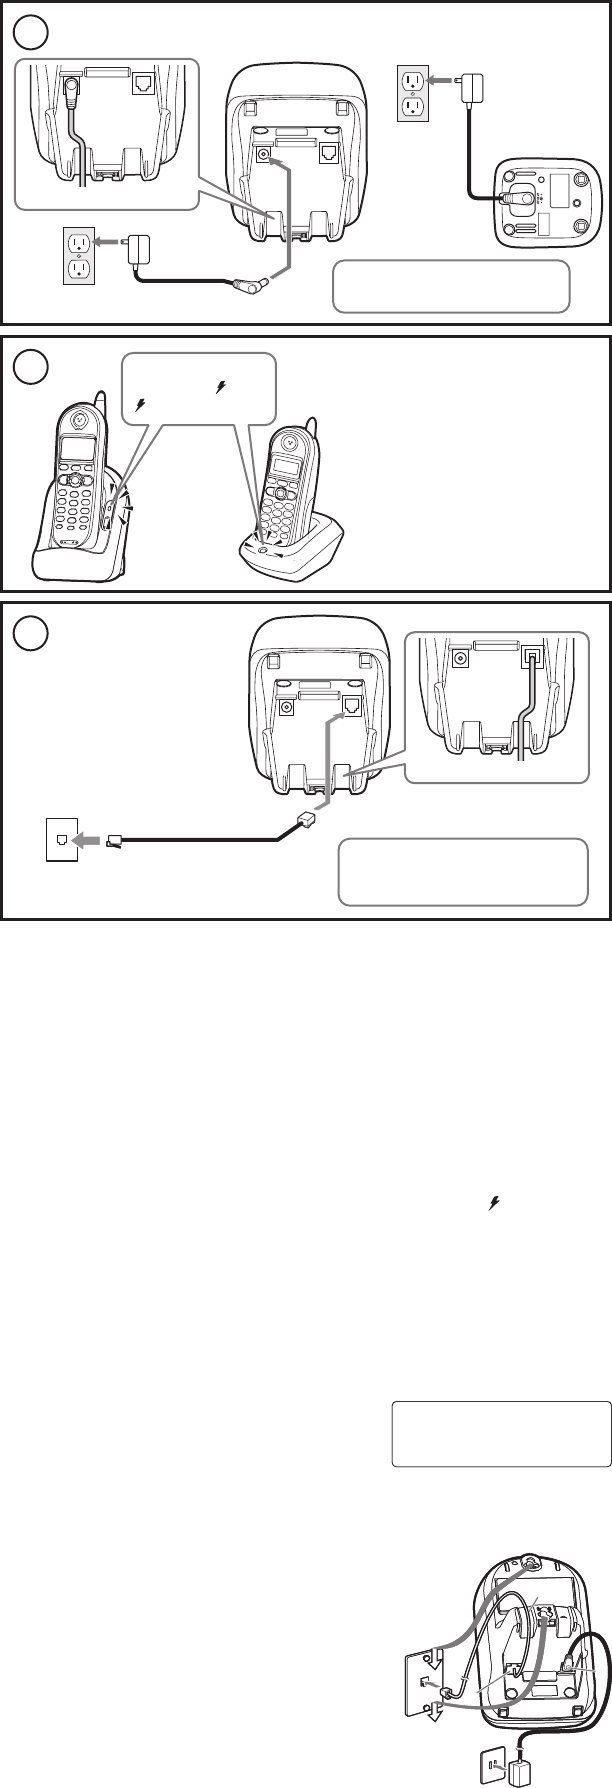
1
Connect each AC adapter to the DC IN 9V jack and
to a standard 120V AC wall outlet.
Do not use a power outlet
controlled by a wall switch.
Route the cord.
To AC outlet
To DC IN 9V
AC adapter (supplied)
To AC outlet
To DC IN 9V
AC adapter
(supplied)
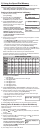
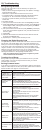
2
Charge the handsets
at least 15-20 hours.
If the LED does not illuminate,
check to see that the AC
adapter is plugged in and
that the handset makes good
contact with the charging
contacts.
Make sure that
the in use/ and
LEDs illuminate.
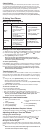
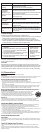
3
Once the handset
battery packs are
fully charged, use
the telephone cord
to connect the
TEL LINE jack to a
telephone wall jack.
To telephone wall jack
To TEL LINE
Telephone cord (supplied)
Route the cord.
Charge both handsets at least
15 to 20 hours before you plug
in the phone cord.
Note:
Do not place the power cord where it creates a trip hazard or
where it could become chafed and create a re or electrical
hazard.
If the telephone cord does not t into your telephone wall jack,
contact your local phone provider for assistance.
Registering Handsets to the Base
Whichever handset you choose to charge in the base is automatically
registered to the base. Any additional handsets must also be registered to
the base before you can use them.
Be sure both handsets are fully charged.
One at a time, place each handset in the base. The in use/ LED on the
base begins to ash, indicating the base is registering the handset.
Wait for at least ve seconds, then pick up the handset and press
[talk/ash]. If the display shows TALK, the handset is registered. If not,
place the handset in the base to try again.
Press [end] and continue with the next handset.
Note:
Once both handsets are registered, it doesn’t matter which
handset is placed in the base or the charger.
When you charge the handsets, the
Caller ID summary screen and the
name of the handset appears.
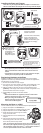
Mounting the Base on a Wall
You can mount the phone on any standard telephone jack wall plate.
Plug the AC adapter to the DC IN 9V jack.
Plug the AC adapter into a standard 120V AC outlet.
Plug the telephone cord into the TEL LINE jack.
Route the telephone cord through the molded
wiring channel as shown.
Plug the telephone cord into the telephone
wall jack.
Align the mounting slots on the base with
the mounting posts on the wall. Then push in and
down until the phone is rmly seated.
Note: To mount the phone directly on the wall, insert two 1
3
/
8
inch,
#10 screws (not supplied) into the wall using anchors suitable for
the wall material. Place the screws 3
15
/
16
inches apart, and allow
1
/
8
inch free space between the wall and screw heads.
•
•
1)
2)
3)
4)
•
•
1)
2)
3)
4)
5)
6)
HS1
Total:00
HS1
Total:00
1
3
4
6
5
6
2
1
3
4
6
5
6
2