


Topcom Fidelity 1150 3
Topcom Fidelity 1150
ENGLISH
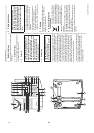
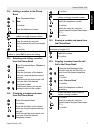
5 Buttons
(See picture 1 and 2 on folded cover page)
1. Hook Switch
2. Direct Memory buttons (M1-M3)
3. LCD display
4. Phonebook button ‘‘
5. Menu botton ‘‘
6. Call List button
7. Up button ‘ ’ / OGM button
8. Down button ‘ ’ / Memo button
9. TAD On LED
10. Stop /
11. Call back button ‘ ’
12.Flash button ’R’
13. Redial button / Pauze button ‘P’
14. Mute button ‘ ’
15. Alphanumerical keypad
16. Volume Down button ‘ ’
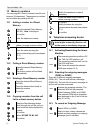
17. Handsfree LED
18. H
andsfree button
19. Ringer LED
20. Volume Down button ‘ ’
21. Menu button
22. Delete button ‘ ’
23. Escape button ‘ESC’
24. Handsfree speaker
25. Wall mounting hook
26. Line cord connector
27. Power adapter connector
28. Wall mounting locations
29. Ringer
30. Cable slots
31. Microphone
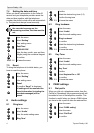
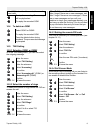
6 Installation
To activate the telephone, it must be connected to
the main power.
•Plug one end of the supplied adapter into the
electric socket and the other end into the
connector on the bottom of the desktop
telephone (27).
• Connect one end of the line cord to the
telephone line wall socket and the other end
to the bottom of the phone (26).
7 Telephone settings
7.1 Introduction
• Press to enter the menu. ‘AUDIO’ is
displayed.
• Use or to scroll though the settings or
to change the setting value.
• Press to enter a submenu.
•Press ESC to leave the setting menu at any
time.
•If no button is pressed within 10 seconds, the
unit will return to standby mode.
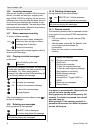
7.2 Setting display language and
voice prompt language
7.3 Setting the display contrast
SET
Enter the menu
Select ‘Setting’
Enter setting menu
‘Language’
‘English’
Select desired language
To confirm
ESC 2 X To leave the menu
Enter the menu
Select ‘Setting’
Enter setting menu
‘Contrast’
‘Contrast-x’
Select desired display contrast (1-5)
To confirm
ESC 2 X To leave the menu
The voice prompt language of internal
digital answering machine, will be the
same as the display language.