


7
Preparation
7. Press and lift out the handset holder, turn it upside
down so its tabbed edge faces up, then slide it back
down into its slot.
Note:
To mount the phone directly on a wall, you need
two screws (not supplied) with heads that fit into the
keyhole slots on the bracket. Follow the steps under “On
a Wall Plate or Wall” on Page 6 then apply these
additional instructions for placement on a wall.
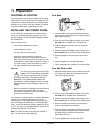
1. Drill two holes 3
15
/
16
inches (100 mm) apart. Thread
a screw into each hole, letting the heads extend
about
5
/
16
inch (8 mm) from the wall.
2. Align the bracket’s keyhole slots with the mounting
screws and slide the corded phone downward to
secure it.
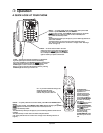
Connecting the Corded Handset
Plug one end of the supplied coiled cord into the modular
jack on the corded phone’s side, then plug the other end
into the modular jack on the corded handset.
Installing the Corded Phone’s Batteries
Your corded phone requires 4 AAA batteries (not
supplied) for Caller ID (CID) memory backup in case of
power failure. For the best performance and longest life,
we recommend RadioShack alkaline batteries.
Cautions:
• Use only fresh batteries of the required size and
recommended type.
• Do not mix old and new batteries, different types of
batteries (standard, alkaline, or rechargeable), or
rechargeable batteries of different capacities.
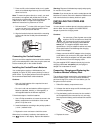
Follow these steps to install the batteries.
1. Use a Phillips screwdriver to loosen the screw in the
battery compartment on the bottom of the corded
phone. Lift up the cover.
2. Install the batteries according to the polarity symbols
(+ and –) marked inside.
3. Replace the cover and secure it with the screw.
When there is no battery installed or the batteries are
low, flashes on the display. Replace the batteries.
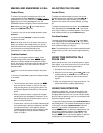
Warning:
Dispose of old batteries promptly and properly.
Do not burn or bury them.
Caution:
If you do not plan to use the corded phone with
batteries for a month, remove the batteries. Batteries can
leak chemicals that can destroy electronic parts.
INSTALLING THE CORDLESS
PHONE
You can place the cordless phone’s charging cradle on a
desk or table. Use the supplied 12V 200mA AC/DC
adapter to power the charging cradle.
Cautions:
You must use a Class 2 power source that
supplies 12V DC and delivers at least 200
mA. Its center tip must be set to positive
and its plug must fit the charging cradle’s
DC 12V
200mA
jack. The supplied adapter meets these
specifications. Using an adapter that does not meet
these specifications could damage the charging
cradle or the adapter.
• Always connect the AC/DC adapter to the charging
cradle before you connect it to AC power. When you
finish, disconnect the adapter from AC power before
you disconnect it from the charging cradle.
Plug the supplied AC/DC adapter’s barrel plug into the
charging cradle’s
DC 12V 200mA
jack, then plug the
adapter into a standard AC outlet.
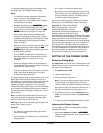
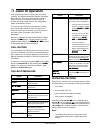
Connecting, Charging and Replacing the
Cordless Handset’s Battery Pack
The cordless handset comes with a rechargeable nickel-
cadmium battery pack. You must connect the battery
pack and charge it for at least 12 hours before you use
the phone for the first time.
1. Slide off the battery compartment cover.
2. Unfasten the retainer strap and lift the battery pack
out of the compartment.
3. Plug the battery pack’s connector into the socket in
the compartment (the connector fits only one way),
then replace the battery pack and fasten the retainer
strap.
4. Replace the cover.
!