


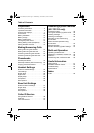


Preparation
12
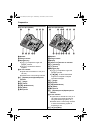
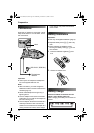
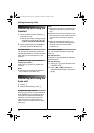
1 Press the notch on the handset cover
firmly and slide it in the direction of the
arrow.
2 Remove the old batteries positive (S)
end first and install the new ones. See
page 10 for battery installation.
Turning the power on/off
Power on
Press {ih} for about 1 second.
L The display will change to the standby
mode.
Power off
Press {ih} for about 2 seconds.
L The display will go blank.
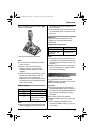
Setting dialling mode
(tone/pulse)
Change the dialling mode depending on
your telephone line service.
“Tone”: Select when you have a touch tone
service.
“Pulse”: Select when you have rotary or
pulse service.
1 Press {j/OK}.
2 Select “Base Unit Setup”, then
press {>}.
3 Enter “0000” (default base unit PIN).
L If you changed the PIN, enter it (page
35).
4 Select “Call Options”, then press
{>}.
5 Select “Dial Mode”, then press {>}.
6 Select the desired setting, then press
{>}.
7 Press {ih}.
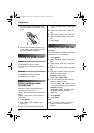
Setting the date and time
Important:
L Confirm that the AC adaptor is connected.
L Ensure that w is not flashing.
1 Press {j/OK}.
2 Select “Handset Setup”, then press
{>}.
3 Select “Time Settings”, then press
{>}.
4 Select “Set Date & Time”, then press
{>}.
5 Enter the current day, month and year by
selecting 2 digits for each.
Example: 17 May, 2006
Press {1}{7} {0}{5} {0}{6}.
6 Enter the current hour and minute by
selecting 2 digits for each.
L You can select “AM”, “PM” or 24-hour
time entry by pressing {*} repeatedly.
Example: 3:30 PM
Press {0}{3} {3}{0}, then press {*}
repeatedly until “03:30 PM” is
displayed.
7 Press {j/OK}.
8 Press {ih}.
Note:
L To correct a digit, press {<} or {>} to
move the cursor, then make the
correction.
TG1223-1233BX(e-e).book Page 12 Wednesday, November 15, 2006 3:32 PM