


7
Basic steps to install
This phone is not fully weather-sealed or waterproof. Its special
construction provides protection against splashes and dripping water.
Any water or liquid exposure other than the above may result in serious
damage to the phone. THE BASE AND CHARGE POD ARE NOT
WATER RESISTANT. ALWAYS WIPE DRY A DIRTY OR WET
HANDSET BEFOR PUTTING IN CHARGE BASE.
1. Connect the output plug of the
mains adaptor to the adapto
r
socket on the back of the base uni
t
and the mains adaptor to the wall
mains supply.
2. Connect the telephone lead to the
phone cord socket on the back o
f
the base unit and to the wall
phone socket.
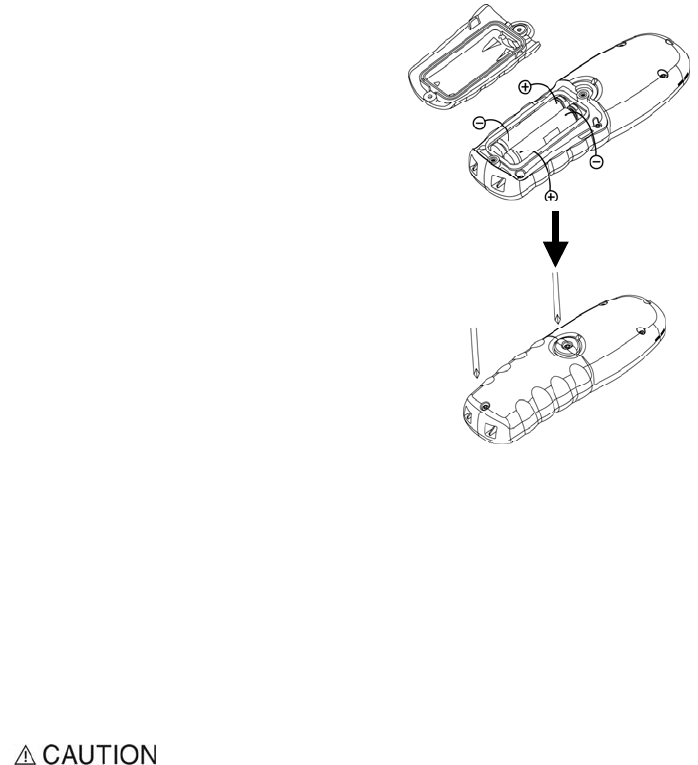
3. Insert 2AAA Ni-MH rechargeable
batteries (supplied) into each
handset, observing the correc
t
polarity, into the battery
compartment on the handset.
(Figure 1)
4. Before placing the battery doo
r
back on the handset, make sure
there is no foreign matter unde
r
the rubber seal located on the
under side.
5. Place the battery door back into
place and tighten the 2 screws
provided. (Figure 2)
6. Place the handset on the base uni
t
and let the batteries charge for a
full 14 hours before using.
7. To attach belt clip Turn the
handset over.
A
lign the belt clip
with the holes on the both sides o
f
the handset. Press into place
Figure 1
Figure 2