


2
2 Installing your Oricom AM880
2.1 Installing the optional backup battery (not included)
Before connecting your AM880 to the telephone network, the battery
should be fitted. Always use a new 9V alkaline block-type battery. The
battery is required for preventing loss data if there should be a mains
power failure.
Note: When icon appears in the display, the battery needs to be
changed.
1. Make sure that the answering machine is not connected to the
telephone network.
2. The battery compartment is to be found on the underside of your
answering machine.
3. Open the battery compartment with a small screwdriver.
4. Connect the battery plug to the battery and place these in the battery
compartment.
5. Close the battery compartment.
2.2 Connecting the telephone line
1. Connect the small plug of the telephone line supplied to the TEL.LINE
socket on the rear of the answering machine.
2. Plug the other end of the cable into your telephone wall socket.
2.3 Connecting mains (AC) power adaptor CAUTION
Use only the mains adaptor supplied with this product. Incorrect adapter
polarity or voltage can seriously damage the AM880. Adaptor Model #:
9VDC300, Input: 240 VAC 50 Hz, Output: 9VDC 300mA
1. Plug the AC adaptor into mains power.
2. Plug the small plug end into the power socket on the rear of the
answering machine.
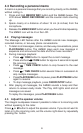
When powering up for the first time, your AM880 will need approx. 20
seconds to initialise all the functions. After the first initialisation, the
display will show LCD CONTRAST.