Using the Voice Mail System
15
Name Dialing
When enabled, the Name Dialing feature allows you to reach a mailbox user from the Auto
Attendant by dialing the user's name on the keypad. The system can be configured to dial by
last name or by first name. Up to 6 letters of the name can be entered. If there is more than
one match, the Auto Attendant lists the names of the matches along with the key to press to
call each match.
To dial by name:
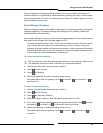
1. Press to transfer to the Auto Attendant.
2. Dial .
3. At the prompt, enter the name using the keypad (press 2 for A, B or C, press 3 for D, E or
F, etc.). You can enter up to 6 letters.
4. If a unique match is found, the Auto Attendant transfers you to the user.
If more than one user name start with the letters entered, the Auto Attendant lists the number
of matches, then reads each match's name followed by the keypad number to enter to be
transferred to that person.
For example:
You are trying to reach James Jones. When you press 9 in the Auto Attendant, you hear
“You can enter up to 6 letters of the person's last name, using 7 for Q and 9 for Z”. You
enter 5 6 6 3 7 for JONES. There is only one voice mail user with the last name spelled by
the letters 5 6 6 3 and 7, and you hear “You are being transferred to James Jones”, and
the Auto Attendant transfers you.
You are trying to reach Jamal Singh. When you press 9 in the Auto Attendant, you hear
“You can enter up to 6 letters of the person's first name, using 7 for Q and 9 for Z”. You
enter 5 2 6 for JAM and wait. There is more than one user with the first name starting with
the letters on 5 2 and 6, and you hear “3 matches were found. To reach Jamal Sing, press
1. To reach James Jones, press 2. To reach Janette Beauchamps, press 3". You press 1
and the Auto Attendant transfers you.
Checking More Than One Mailbox
To check more than one mailbox during a single call to the system:
1. Check messages in the first mailbox as you normally do (see “Calling for Messages” on
page 9).
2. After you finish with that mailbox, press to return to the Auto Attendant.
3. Press when you hear the company greeting. The system asks for the new mailbox
number.
4. Enter the mailbox number. Repeat steps 2 to 4 for each mailbox that you wish to check.


