Setup Options 3-13
Inaset User Guide - Issue 1.0
Screen Saver
7KH6FUHHQ6DYHUIXQFWLRQZLOODFWLYDWHRQWKH,QDVHWGLVSOD\DIWHUD
SUHVHWWLPHSHULRGRIQRDFWLYLW\:KHQWKH6FUHHQ6DYHUEHJLQV
SUHVVLQJDQ\,QDVHWNH\RUDFWLYLW\RQ\RXUPDLQSKRQHOLQHZLOOFOHDU
VDYHUPRGHDQGUHWXUQ,QDVHWWRQRUPDORSHUDWLRQ)ROORZWKHVWHSVWR
VHWXSWKHVFUHHQVDYHUIXQFWLRQIRUWKHGLVSOD\
Step 1 Start the Setup application as described at the beginning of this chapter.
At the Setup menu, use the cursor key to select LCD and press the
Enter key.
Step 2 Again use the cursor key to select Screen Saver and press the Enter
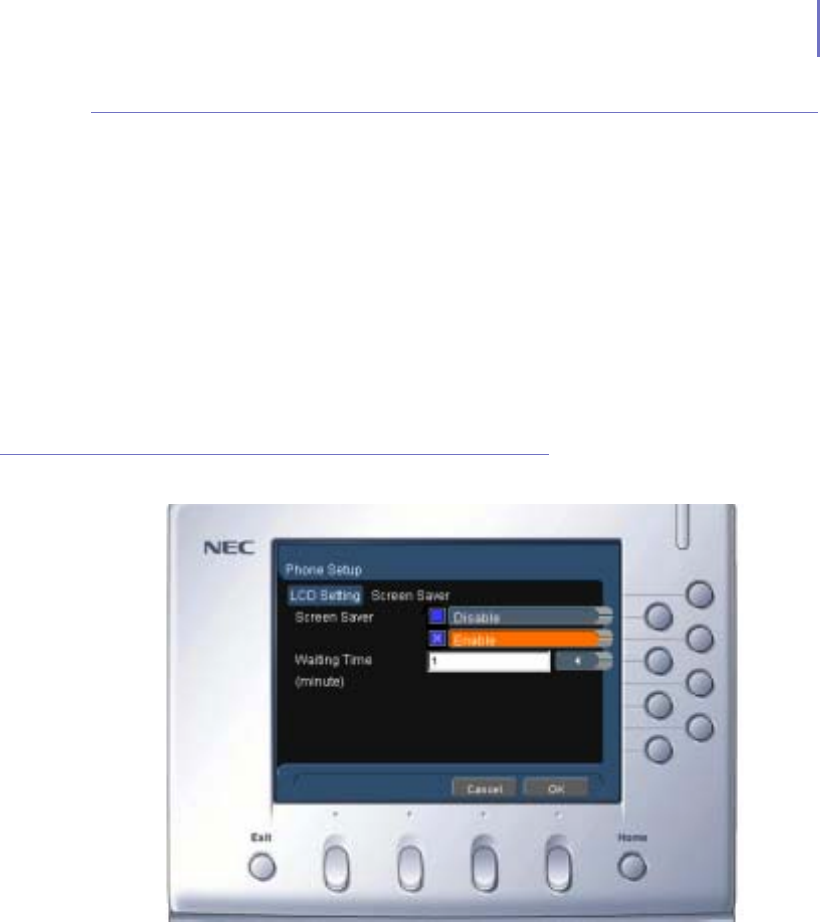
key. The LCD Setting Screen Saver window displays (below).
LCD Setting- Screen Saver window
Step 3 Press the control key for Enable to enable the Screen Saver function.
—If disabling this function, press the control key for Disable and skip to
Step 5 below.
Step 4 Press the control key for Waiting Time, and enter the time period (in
minutes) before the Screen Saver begins. This would be the period of no
activity on Inaset before the Screen Saver would begin.
Step 5 Press the soft key for OK, then press the soft key for Save to save your
settings.
Step 6 Press the soft key for OK to confirm that you really want to save your
settings. Your display settings have now been changed. (These changes
will not take affect until your Inaset phone has been reset.)
