


Dolphin® 7900 Series Mobile Computer User’s Guide 5 - 3
Activating the Engine
The Dolphin 7900 offers the following options to activate the engine:
• The Scan key located in the center the keyboards for easy access from either hand - see SCAN key on page 6-4.
• The buttons located on both side panels - see Side Panel Features on page 3-6.
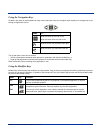
Programmable Side Buttons
The buttons on the side panel - Side Panel Features on page 3-6 - activate the imager by default. These buttons can be
programmed to perform specific functions as well as open software applications. To program these buttons, see Buttons on page
7-3. If the buttons on the side panel have not been programmed, pressing either one will activate the image engine.
Demos
All Dolphin 7900 terminals contain demos that enable you to test and verify the image engine. To access these demos, go to
Start > Demos,
• Select Image Demo to verify imaging, or
• Select Scan Demo to verify decoding.
For more information, see Verify Operations with Demos on page 2-10.
Decoding
The Dolphin 7900 terminal supports two types of image decoding for use in various bar code reading and imaging applications:
full-area imaging and Advanced Linear Decoding (ALD).
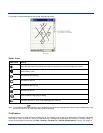
Full-area Imaging
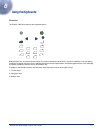
Full-area imaging provides omni-directional reading of linear and non-linear 1D and 2D bar codes, OCR, signature capture, and
picture taking. When reading all bar code types using full-area imaging, a positive read can be obtained from many positions;
see Omni-Directional Scanning Options on page 5-4. To achieve the best read, the aiming beam should be centered horizontally
across the bar code.
ALD
ALD provides fast reading of linear and stacked linear bar codes. To achieve a positive read when reading linear 1D and PDF417
bar codes, the green aiming beam should be centered horizontally across the bar code. When ALD is enabled, the reader does
not read matrix or postal codes.
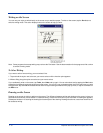
To Decode a Bar Code
1. Tap Start > Demos > Scan Demo.
2. Position the Dolphin 7900 terminal over the bar code. A range of 4-10 inches (10-25 cm) from the bar code is recommended.
3. Project the imager’s aiming beam by pressing and holding the SCAN key or side button; Programmable Side Buttons, page
5-3‘.
4. The Scan LED lights red; Scan LED, page 3-2.
5. Center the aiming beam over the bar code. The aiming beam should be oriented in line with the bar code to achieve optimal
decoding;
Omni-Directional Scanning Options, page 5-4
6. Release the SCAN key or side button.
7. When the bar code is successfully decoded, the decode LED lights green and the terminal beeps; Decode LED, page 3-2.