


USING THE DIRECTORY
This unit stores the numbers of up to 99 of your business associates, clients, contacts,
and friends in your directory. You can dial these numbers by selecting them. Names are
sorted alphabetically starting with the first character. (If you want your Directory sorted
by the last name, enter the last name first.)
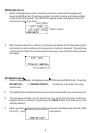
To Store A New Number And Name Into The Directory
Press SAVE to store a number in the Directory. After pressing SAVE, the display will show
“Save To?”. Press the DIRECTORY button. “Enter Number>” will appear in the display.
Enter the desired number using the keypad. (max 24 digits). Press SAVE to confirm. “Enter
Name” will appear. Type the name using the keypad. Press SAVE again to confirm all
settings. “Number Stored” will show briefly.
Note: For Example, if A is the desired letter, press the #2 button once and A will appear
on the display. If B is the desired letter, press the #2 button twice and B will appear on
the display. Pressing the #2 button three times will select the letter C. If the incorrect letter
is accidentally selected, press the down review arrow and start over. All letters are upper
case. To enter a space when storing a name or number, press the up review arrow. Note:
Use the Volume/Edit key to edit entries.
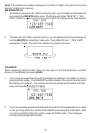
Finding Items In The Directory
Press DIRECTORY to enter the Directory Review Mode. The first entry in the Directory
is displayed. The Down and Up Review Arrows may be used to scroll through the
directory. To leave the directory at any time, press Dir.
To search for a directory entry, press DIRECTORY, then using the keypad, type the desired
name. If an entry that begins with the letter C is desired, then press 2 three times. Refer
to the note above.
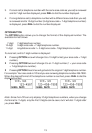
Dialing Telephone Numbers In The Directory
Find the number you want to dial in the Directory List. (Telephone can be on or off hook)
When the number shows on the display, press DIAL to start dialing.
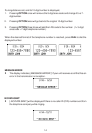
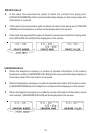
Deleting Items In The Directory
Deleting Individual Entries
Enter the directory and select the individual entry. To delete an individual entry, press the
DELETE button once and then press 1 to confirm the deletion or 2 to cancel it. The display
will be erased line by line and the remaining items will be re-sorted.
Deleting All Entries
Enter the directory. To delete all entries, press and hold the DELETE button. “DELETE ALL”
will appear in the display, select (1) for YES or (2) for NO. “NO RECORDS” appears in
the display confirming there are no directory entries in memory.
16