


28
These instructions are continued from Chapter 1.
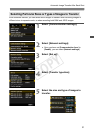
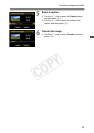
1
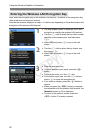
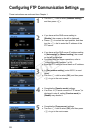
Turn the <5> dial to select [Address setting],
and then press <0>.
2
If you have set the DNS server setting to
[Disable], the screen on the left is displayed.
Press <0> to select the input position, and then
turn the <5> dial to enter the IP address of the
FTP server.
If you have set the DNS server IP address setting
to [Auto assign] or [Manual setting], the screen
on the left is displayed.
For instructions on screen operations, refer to
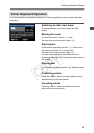
“Virtual Keyboard Operation” (p.25).
Enter the FTP server’s server name or IP address.
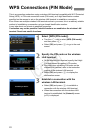
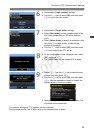
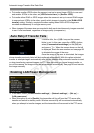
3
In [Port number setting], enter 00021, in most
cases.
Turn the <5> dial to select [OK], and then press
<0> to go to the next screen.
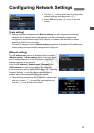
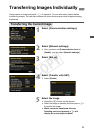
4
Complete the [Passive mode] settings.
If an Error 41 (“Cannot connect to FTP server”) is
displayed in step 8, setting [Passive mode] to
[Enable] may resolve it.
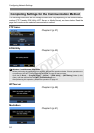
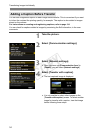
5
Complete the [Proxy server] settings.
Turn the <5> dial to select [OK], and then press
<0> to go to the next screen.
Configuring FTP Communication Settings
COPY