


13
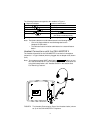
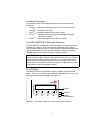
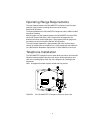
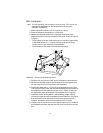
9. Place the base of the telephone on the wall-jack mounting studs, and
pull downward until it is secure. (See Figure 6.)
FIGURE 6 Placing the Telephone on the Wall Jack Mounting Studs
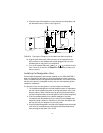
10. Plug the quick-disconnect (QD) connector on the headset into the
QD connector on the headset cord already plugged into one of the
Headset jacks on the back of your telephone.
11. Turn on the headset OR press (or
) and listen for dial
tone. If there is no dial tone, check all wire connections to make sure
they are secure.
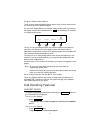
Installing the Designation Card
Use the button designation card, already installed on your CALLMASTER V
when it is shipped from the factory to write the telephone number, extension,
name, or feature that each call appearance/feature button can access. On the
left side of the phone is a Notepad on which you can write frequently-dialed
numbers or extensions.
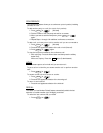
To label and install the designation card and telephone Notepad
1. The transparent designation card and Notepad covers are attached to
the frame of the telephone by tabs on the top and bottom of the cover.
Remove either or both of these covers by pulling the top tab forward
and then lifting the bottom of the transparent cover from the telephone.
2. Print the numbers/features on the button designation card that
corresponds with the telephone you are using. On the Notepad write
frequently-called numbers or extensions or any other information that
will help you use your telephone in your daily work.
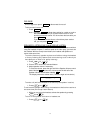
3. Place the button designation card and/or the Notepad under the plastic
card cover on the telephone by inserting the tabs at the bottom and
then pressing the top down until it clicks.
Spkr