


8 - English
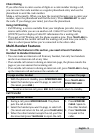
You can adjust the ringer volume when the phone is in standby; to turn off the
ringer, turn the ringer volume all the way down.
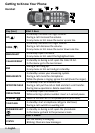
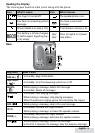
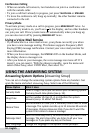
Finding the Handset
With the phone in standby, press
fINd
on the base. All handsets beep for 1
minute. To cancel, press
fINd
again or press any handset key.
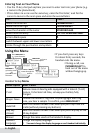
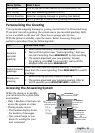
Using the Phonebook, Caller ID, and Redial Lists
x The phone can store up to 70 entries in its phonebook.
x If you subscribe to Caller ID (CID) service, the phone stores the information
for the last 30 received calls to the CID list. Contact your telephone provider
for more information.
x Each handset remembers the last 5 numbers you dialed on it.
x Only one handset can access one of the lists at a time.
To... Press...
open the list
phoNEbook/LEfT, caLLEr Id/rIghT
, or
rEdIaL/pausE
.
scroll through the list
up
or
dowN
.
dial the current entry
TaLk/fLash
or
spEakEr
.
add 1 at the front of CID number
*
before dialing for a toll call.
store the current CID or redial
entry to the phonebook
MENu/sELEcT
, then select Store Into Pb.
Edit the name and number as needed.
edit the current phonebook entry
MENu/sELEcT
, then select Edit.
delete the current entry
MENu/sELEcT
, then select Delete (or
Delete Entry). To confirm, select Yes.
close the list
phoNEbook/LEfT
.
# When it’s in standby, the handset shows how many calls came in
since the last time you checked the CID list.
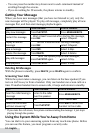
Adding Phonebook Entries
With the phone in standby, open the phonebook. Press
MENu/sELEcT
and then
select Create New. Proceed to enter a name and number.
x Enter the phone number (up to 20 digits) exactly as you would dial it.
x If you need to enter a pause between the numbers, press
rEdIaL/pausE
; you’ll
see a P in the display. (The dialing will pause for about 2 seconds per a digit.)
x To edit the number, press
INTErcoM/cLEar
to back up the cursor and delete
numbers. Re-enter the correct numbers.
Deleng All the Entries
With the phone in standby, open the list (phonebook, CID, or redial). Press
MENu/
sELEcT
and then select Delete All. To confirm, select Yes.