


Deskmaster 125Deskmaster 125
36
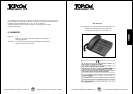
2. AANSLUITING
1. Place the Deskmaster 125 on a hard flat surface.
2. Insert the small plug of the AC 10V adaptor in the phone and the other end
in the wall outlet.
3. Insert the small connector of the telephone cable into the answering
machine and plug the other end in the wall outlet.
4. The display counts down from 10 to 00.
5. Open the battery compartment and insert a 9V battery (not included).
This battery makes sure that no settings get lost in case of a power failure.
3. OPERATION TELEPHONE
3.1. HANDSFREE CALLING
Press the Handsfree button, wait until you hear the dial tone and dial the tele-
phone number. You can communicate without having to pick up the receiver.
When the line is busy, end the connection by pressing the Handsfree button
again.
3.2. REDIAL
The last number dialled is saved (max. 32 digits). When you wish to dial this
number again, pick up the receiver and press the Redial button. The telephone
number is now redialled automatically.
3.3. MEMORY NUMBERS
a) One touch memory (M1,M2)
-Pick up the handset.
-Press the Store button
-Enter the telephone number (max. 16 digits)
-Press the Store button
-Press M1 M2 or M3 to store the number under this key.
35
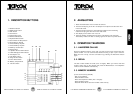
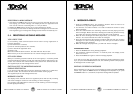
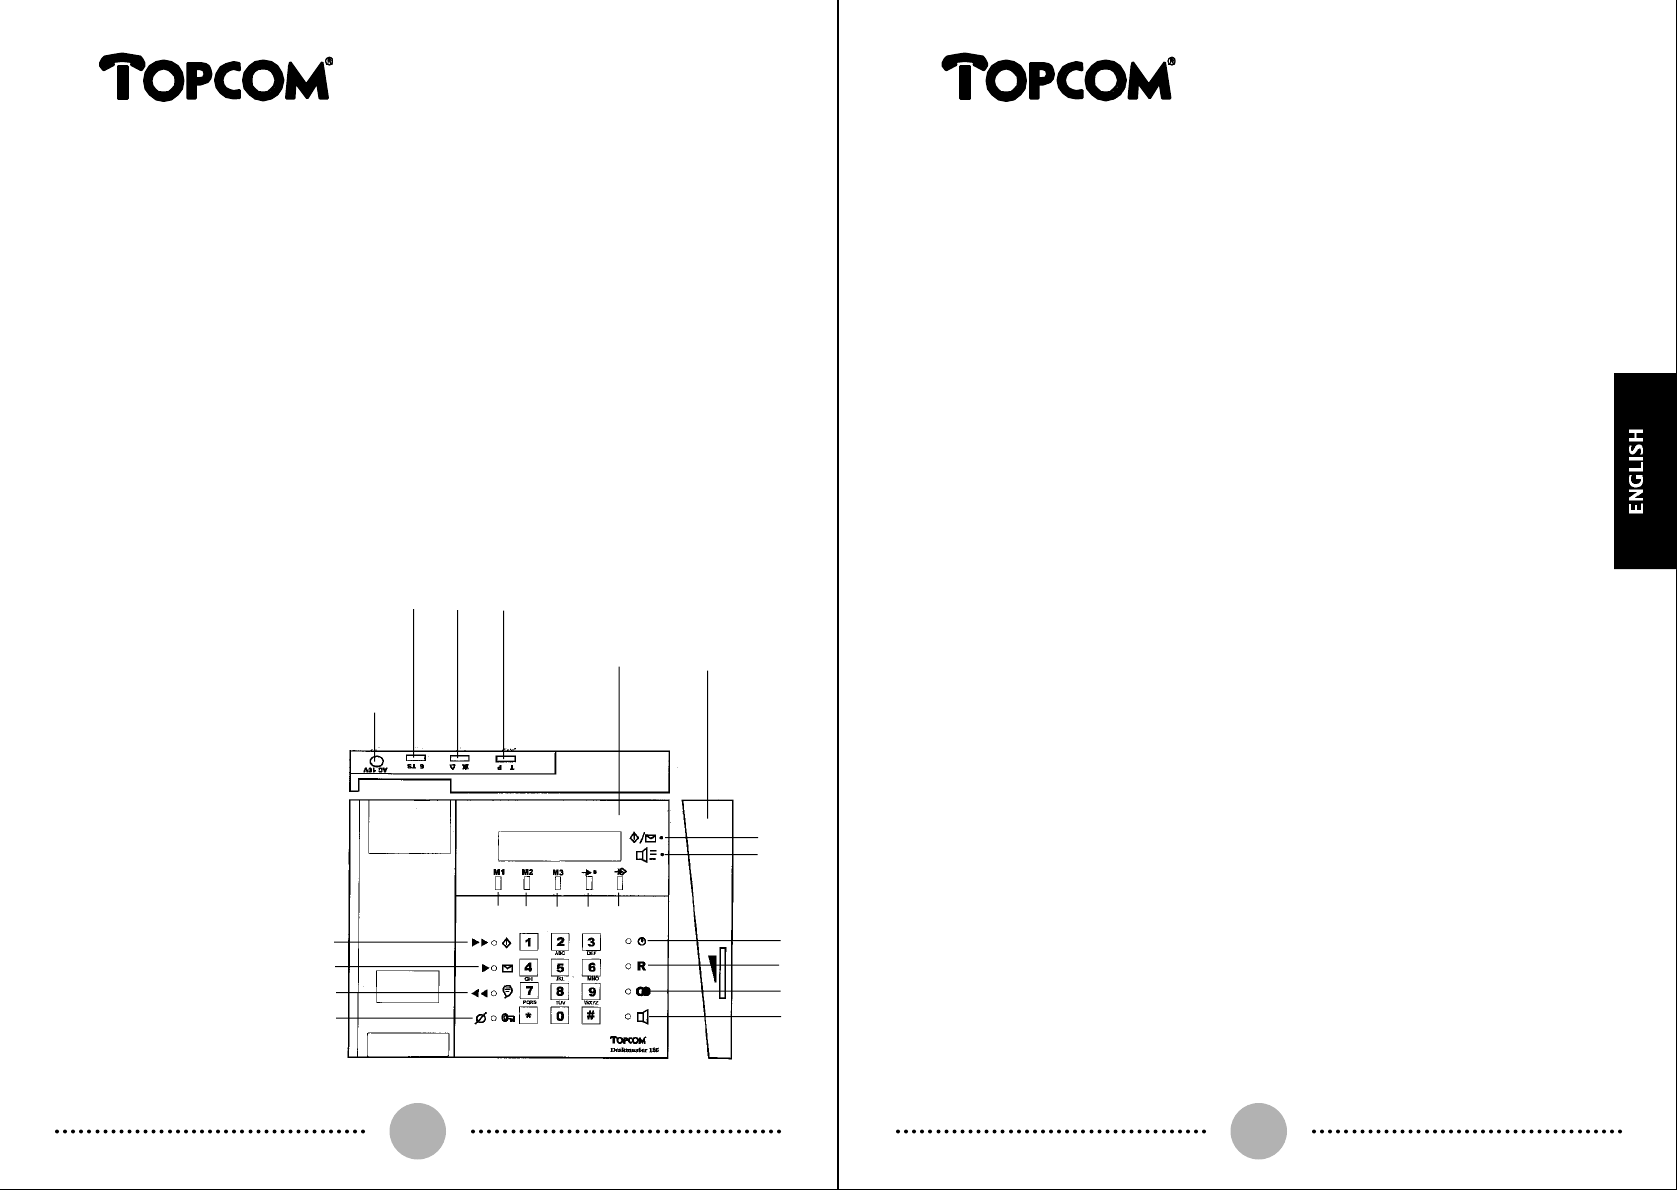
1. DESCRIPTION BUTTONS
1. Handsfree button
2. Redial/Pause button
3. Flash button
4. Clock button
5. Erase/Code button
6. Rewind/OGM button
7. Playback/Memo button
8. Fast forward/On/Stop button
9. Direct Memory Key M1
10. Direct Memory Key M2
11. Direct Memory Key M3
12. Memory recall button
13. Store button
14. “Speaker Phone” LED indicator
15. “New Messages” LED indicator
16. AC adaptor 10V
17. Toll Saver button
18. Ring volume switch
19. Tone/Pulse switch
20. Battery compartment
21. Volume switch
21
19
1817
16
15
14
9 10
11
12 13
8
7
6
5
4
3
2
1
20