


2
Adjustable Ring Number
— lets you set the
system to answer after two, four, or seven
rings.
Toll-Saver
— lets you avoid unnecessary toll
charges when you call by long-distance to
check your messages.
Remote Operation
— lets you use a touch-
tone phone (or rotary phone and pocket tone
dialer) to operate the system and Caller ID
while you are away from your home or office.
Phone Pick-Up Detection
— stops record-
ing when you pick up any phone on the same
line as the system.
Call Screen
— lets you listen as a caller
leaves a message so you can decide wheth-
er or not to answer the call.
Programmable Remote Operation Securi-
ty Code
— lets you set your own security
code for remote operation.
High Memory Capacity
— lets you record
up to 25 minutes of messages, memos and
two-way phone conversation.
Ten VIP Memory with Mailbox and Alert
Tone
— lets you save up to ten caller ID
records in the VIP list and record a VIP call-
er’s message in each VIP mailbox. Then,
when a VIP caller calls, the system sounds a
distinctive tone.
Mailbox with Individual OGM
— lets you
record a personalized outgoing announce-
ment for each VIP mailbox. When a VIP call-
er calls, the system plays your
announcement and records the caller’s mes-
sage in its own VIP mailbox.
Mailbox with Audible and Visual Alert In-
dicator
— alerts you to a new message in a
VIP mailbox with an audible tone and individ-
ual lighted indicator.
CALLER ID FEATURES
3-Line Display with Backlight
— lets you
view an entire Caller ID record on one
screen.
Caller ID Memory
— stores up to 99 Caller
ID records with name and number or name
only, depending on the information your
phone company provides.
Multi-Language
— displays caller ID mes-
sages in English or Spanish.
New Call Indicator
— lets you see at a
glance that you have new calls.
Review Scrolling
— lets you easily scroll
through all records in Caller ID memory.
Callback
— lets you dial the phone number
in a Caller ID record with the touch of a but-
ton.
Call Waiting ID
— displays information
about an incoming call when you are on the
phone.
+056#..#6+10
Select a location for the system that is near a
modular telephone line jack, a telephone,
and an AC outlet, and is not in the way of
normal activities.
CONNECTING THE SYSTEM
Your telephone connects directly to a modu-
lar telephone line jack. If your telephone wir-
ing does not have a modular jack, you can
update the wiring yourself using jacks and
adapters (available at your local RadioShack
store), or have the telephone company up-
date the wiring for you. You must use com-
patible modular jacks that are compliant with
Part 68 of
FCC Rules
.
Note:
The USOC number of the jack to be in-
stalled is RJ11C.
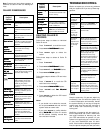
Follow these steps to connect your system to
the telephone line and phone.
1. Unplug the telephone’s modular cord
from the modular phone line jack and
plug it into the
PHONE
jack on the back
of the system.
2. Plug one end of the supplied modular
cord into the
LINE
jack on the back of the
system and plug the cord’s other end
into a modular phone line jack.
Cautions:
You must use a Class 2 power
source that supplies 9V DC
and delivers at least 500 mA.
Its center tip must be set to positive and
its plug must fit the system's
DC 9V 500
mA
jack. The supplied adapter meets
these specifications. Using an adapter
that does not meet these specifications
could damage the system or the
adapter.
• Always connect the AC adapter to the
system before you connect it to AC
power. When you finish, disconnect the
adapter from AC power before you dis-
connect it from the system.
3. Insert the supplied AC adapter’s barrel
plug into the
DC 9V 500 mA
jack on the
back of the system. Plug the other end
of the adapter into a standard AC outlet.
Note:
This system cannot operate without
AC power.
INSTALLING A BACKUP
BATTERY
If the AC power fails or you unplug the sys-
tem, you need one 9V alkaline backup bat-
tery (not supplied) to save the answering
system’s messages and settings for the day
and time. For the best performance and long-
est life, we recommend you use a Ra-
dioShack alkaline battery.
Caution:
Use only fresh batteries of the re-
quired size and recommended type.
1. Use a flat-blade screwdriver to lift up and
remove the battery compartment’s
cover.
2. Attach a 9V alkaline battery to the termi-
nals and place the battery in the com-
partment.
3. Snap the battery compartment cover into
place.
Replace the battery when appears.
Warning:
Dispose of the old battery promptly
and properly. Do not burn or bury it.
Cautions:
• Before you replace the battery, be sure
the system is properly connected to AC
power. Otherwise, you might lose any
stored information.
• Disconnect the telephone line cord
before replacing the battery to reduce
the risk of fire or injury. Use only a 9V
alkaline battery.
• If you do not plan to use the system with
batteries for a month, remove the bat-
tery. A battery can leak chemicals that
can destroy electronic parts.
#059'4+0)"5;56'/
PREPARATION
When you first connect power,
?d_j_Wb_pWj_ed
?d_j_Wb_pWj_ed?d_j_Wb_pWj_ed
?d_j_Wb_pWj_ed
and
'(0&&ý7C
'(0&&ý7C'(0&&ý7C
'(0&&ý7C
and
'%&'
'%&''%&'
'%&'
appears. The system
runs a self test, and sets all internal default
values followed by 4 tones.
I[b[YjýBWd]kW][
I[b[YjýBWd]kW][I[b[YjýBWd]kW][
I[b[YjýBWd]kW][
,
7h[Wý9eZ[
7h[Wý9eZ[7h[Wý9eZ[
7h[Wý9eZ[
,
F?D
F?DF?D
F?D
,
:Wo
:Wo:Wo
:Wo
E<
E<E<
E<
M[[a
M[[aM[[a
M[[a
appear, then the
system beeps twice and
&ý D[mý &ý JejWbý
&ý D[mý &ý JejWbý&ý D[mý &ý JejWbý
&ý D[mý &ý JejWbý
ap-
pears. To set your own language, area code
pin and day of the week, see “Setting Up
Your System.”
!