


15
Voice Mail
*
Voice Mail is an optional feature configured
on the server and may not be supported on your
particular system. Contact your system adminis-
trator to find out.
†
Screen options may vary with server-based
application. Voice Mail can be accessed with a
single key press. Contact your system adminis
-
trator to configure this option.
Received messages will be indicated by a
flashing Message Waiting Indicator LED
on the front of the phone and optionally a
visual notification on the display.
Individual line indicators reflect voice
messages left on that line (useful if mul-
tiple lines are in use).
A stutter dial tone in place of normal dial
tone is used to indicate that one or more
voice messages are waiting at the message
center.
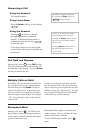
To listen to voice messages:
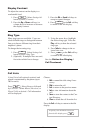
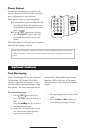
1. Press
Hold
Del
Sel
Conference
1 3
DEF
5
JKL
4
GHI
6
MNO
8
TUV
7
PQRS
9
WXYZ
0
OPER
*
#
2
ABC
Hold
Del
Sel
Directories
Services
Call Lists
Buddy Status
My Status
Redial
Menu
Messages
Do Not Disturb
ABC
21
DEF
3
54
MNOJKLGHI
6
TUV
87
WXYZ
9
OPER
PQRS
0
and select Fea-
tures, Messages
*,†
.
2. (Optional) If multiple lines are in
use, select from which line mes-
sages are to be retrieved.
3. Display indicates number of mes
-
sages and their importance. Press
Connect to initiate retrieval from the
Message Center,
OR
Press
Clear to turn off the flashing
LED without listening to messages.
4. Follow voice prompts to listen to
messages.
Distinctive Ringing / Call Treatment
Users can set distinctive incoming ringing tones for
contacts in their local directory. This allows identifica
-
tion of a contact by a specific ring tone.
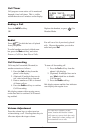
To set a distinctive ring for a local contact:
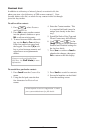
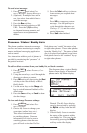
1. Press
Hold
Del
Sel
Conference
1 3
DEF
5
JKL
4
GHI
6
MNO
8
TUV
7
PQRS
9
WXYZ
0
OPER
*
#
2
ABC
Hold
Del
Sel
Directories
Services
Call Lists
Buddy Status
My Status
Redial
Menu
Messages
Do Not Disturb
ABC
21
DEF
3
54
MNOJKLGHI
6
TUV
87
WXYZ
9
OPER
PQRS
0
, select Features,
Contact List.
2. Using the arrow keys, scroll
through the directory to choose a
contact.
3. Press
Edit and scroll down using the
Next soft key to Ring Type.
4. Enter a number corresponding
to one of the ring types available
(press then the Delete soft
key
to remove an existing value).
5. Press the
Save soft key or Cancel to
abandon the change.
Incoming calls from this contact
will now have the distinctive ring
-
ing pattern applied.
See Ring Type in this guide for further
details.
This feature is local to the phone, and may be over-ridden by serv-
er settings. Contact your system administrator for more details.