


Programmable Settings
42 For assistance, please call 1-800-211-PANA (7262).
1 Handset:
Press {MENU}.
2 Scroll to “Initial setting” by
pressing {V} or {^}, then press {>}.
3 Scroll to “Registration” by pressing
{V} or {^}, then press {>}.
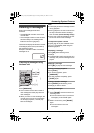
4 KX-TG5431 base unit:
Press and hold {LOCATOR/
INTERCOM} until the CHARGE
indicator flashes.
KX-TG5432 base unit:
Press and hold the locator/handset
button that corresponds to the handset
you want to re-register ({LOCATOR/
INTERCOM 1} or {LOCATOR/
INTERCOM 2}) until the registering
handset number (H1 or H2) is
displayed.
KX-TG5433 base unit:
Press {SELECT} repeatedly until the
desired extension number (H1, H2,
or H3) is displayed on the base unit,
then press and hold {CALL}.
LAfter the CHARGE indicator starts
flashing, the rest of the procedure
must be completed within 1 minute.
5 Handset:
Press {OK}, then wait until the handset
beeps.
LRegistration is complete.
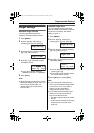
Time adjustment (Caller ID
subscribers only)
Using this feature, the unit’s date and time
setting will be automatically adjusted when
caller information is received. To turn this
feature on, select “Caller ID[auto]”
(default). To turn off, select “Manual”.
1 Press {MENU}.
2 Scroll to “Initial setting” by
pressing {V} or {^}, then press {>}.
3 Scroll to “Time adjustment” by
pressing {V} or {^}, then press {>}.
4 Press {V} or {^} repeatedly to select
“Manual” or “Caller ID[auto]”.
5 Press {Save}, then press {OFF}.
Note:
LTo use this feature, set the date and time
manually first (page 16).
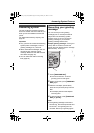
Customer support
The handset can display the Internet
address where you can download
operating instructions for this product
using your computer.
1 Press {MENU}.
2 Scroll to “Customer support” by
pressing {V} or {^}, then press {>}.
L“www.panasonic.com/support”
will be displayed.
3 Press {OFF}.
TG5431_5432_5433(e).book Page 42 Friday, January 14, 2005 4:11 PM