6
Headset Installation
Your telephone may be used with an optional headset. To use this feature, simply plug the headset
into the headset jack on the handset. Your telephone is ready for handsfree conversation.
Setting the Dial Mode Switch
Place the switch in the “Tone” position for tone dialing, or the “Pulse” position for pulse dialing.
The ability to pulse dial is dependent upon the telephone system and/or the outside lines to which
the D
term
Analog Cordless is connected.
Charging the Battery
The plastic connectors will fit together only one way. Make sure the battery connector is properly
aligned.
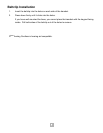
1. Remove the handset battery cover.
2. Plug the battery cable into the handset and place the battery pack inside the battery
compartment.
3. Replace the battery cover.
4. Place the handset on the base to charge. (The handset can charge in either the face-up or
face-down position.)
Low Battery Indicator
When the battery pack in the handset needs to be charged, the talk/battery low indicator flashes.
If this occurs while you are on the telephone, you will hear an alert tone. Complete your call as
quickly as possible and return the handset to the base unit for charging.
Cleaning Battery Contacts
To maintain a good charge, it is important to clean all battery contacts on the handset and base unit
about once a month. Use a dry cloth or pencil eraser, if necessary. Do no use any liquids or
solvents.
Before plugging the telephone line into your new telephone, the rechargeable
nickel-cadmium battery pack must be fully charged. Charge the battery for
approximately 15 to 20 hours without interruption.


