QUICK START GUIDE
MicroTek Electronics, Inc. recommends that all equipment be bench tested before being
installed onsite. This test will ensure that all components of your application are
functioning properly.
DATA TRANSCEIVER SET-UP
1. Remove each Transceiver from the box and attach its omni-directional dipole antenna.
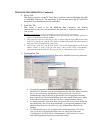
2. If the device in use operates at a different Baud Rate than the factory setting of 4800, the
radio must be changed to the desired Baud rate using the Software. See Pages 5 and 6 for
information on changing the radio’s Baud Rate.
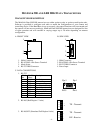
3. Select the correct mode of operation; either RS-232 or RS-422/485. Factory set to RS-
422/485.
4. For RS-422/485, determine whether a 2-wire or 4-wire set-up is required and wire into
TX +/- at the control panel and RX +/- at the camera (Pan / Tilt / Zoom Camera
applications).
5. Perform a bench test to make sure all PTZ functions can be controlled wirelessly.
6. Mount each Transceiver in an area that has clear, wide-open line of sight to the other
Transceiver. A weatherproof enclosure must be used if mounted outdoors or in a harsh
environment. If our weatherproof enclosure is used, mount using the double-sided tape.
There is enough room in our weatherproof housing for the video transmitter/receiver and
Data transceiver.
7. The red LED will light up when power has been connected and applied. One 12 VDC
power supply is included in the system for each Transceiver.
Trouble Shooting: If you cannot control the PTZ functions wirelessly or if you are
having other operational difficulties, please visit the trouble shooting section in this
operations manual or contact MicroTek toll free at (888) 366-4276 for technical
assistance. MicroTek’s toll-free technical assistance is available weekdays from 8 am to 5
pm Pacific Time.
- 2 -


