


8
Section 2: Operation
FS500, FS700 & FS1000 Fertilizer Spreaders 309-500M 6/27/08
Land Pride
Table of Contents
Section 2: Operation
Transporting
The Fertilizer Spreader is equipped with a towing hook for
trailers. Maximum towing weight is 1200 pounds.
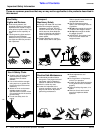
!
CAUTION!
Never transport your Fertilizer Spreader at speeds in excess of
20 miles per hour.
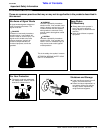
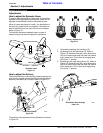
Driveline Installation
!
DANGER!
Tractor PTO shield must be in place at all times during
operation!
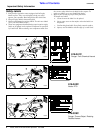
1. Slide driveline end with extended safety cone over
splined shaft of the gearbox and secure with attaching
device.
2. Slide driveline over thetractor’s splinedPTO shaft and
secure with locking device of driveline.
3. Driveline should now be moved back and forth to
insure that it is secure on the PTO shaft of the tractor
and spreader gearbox.
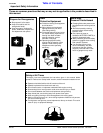
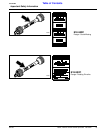
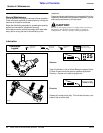
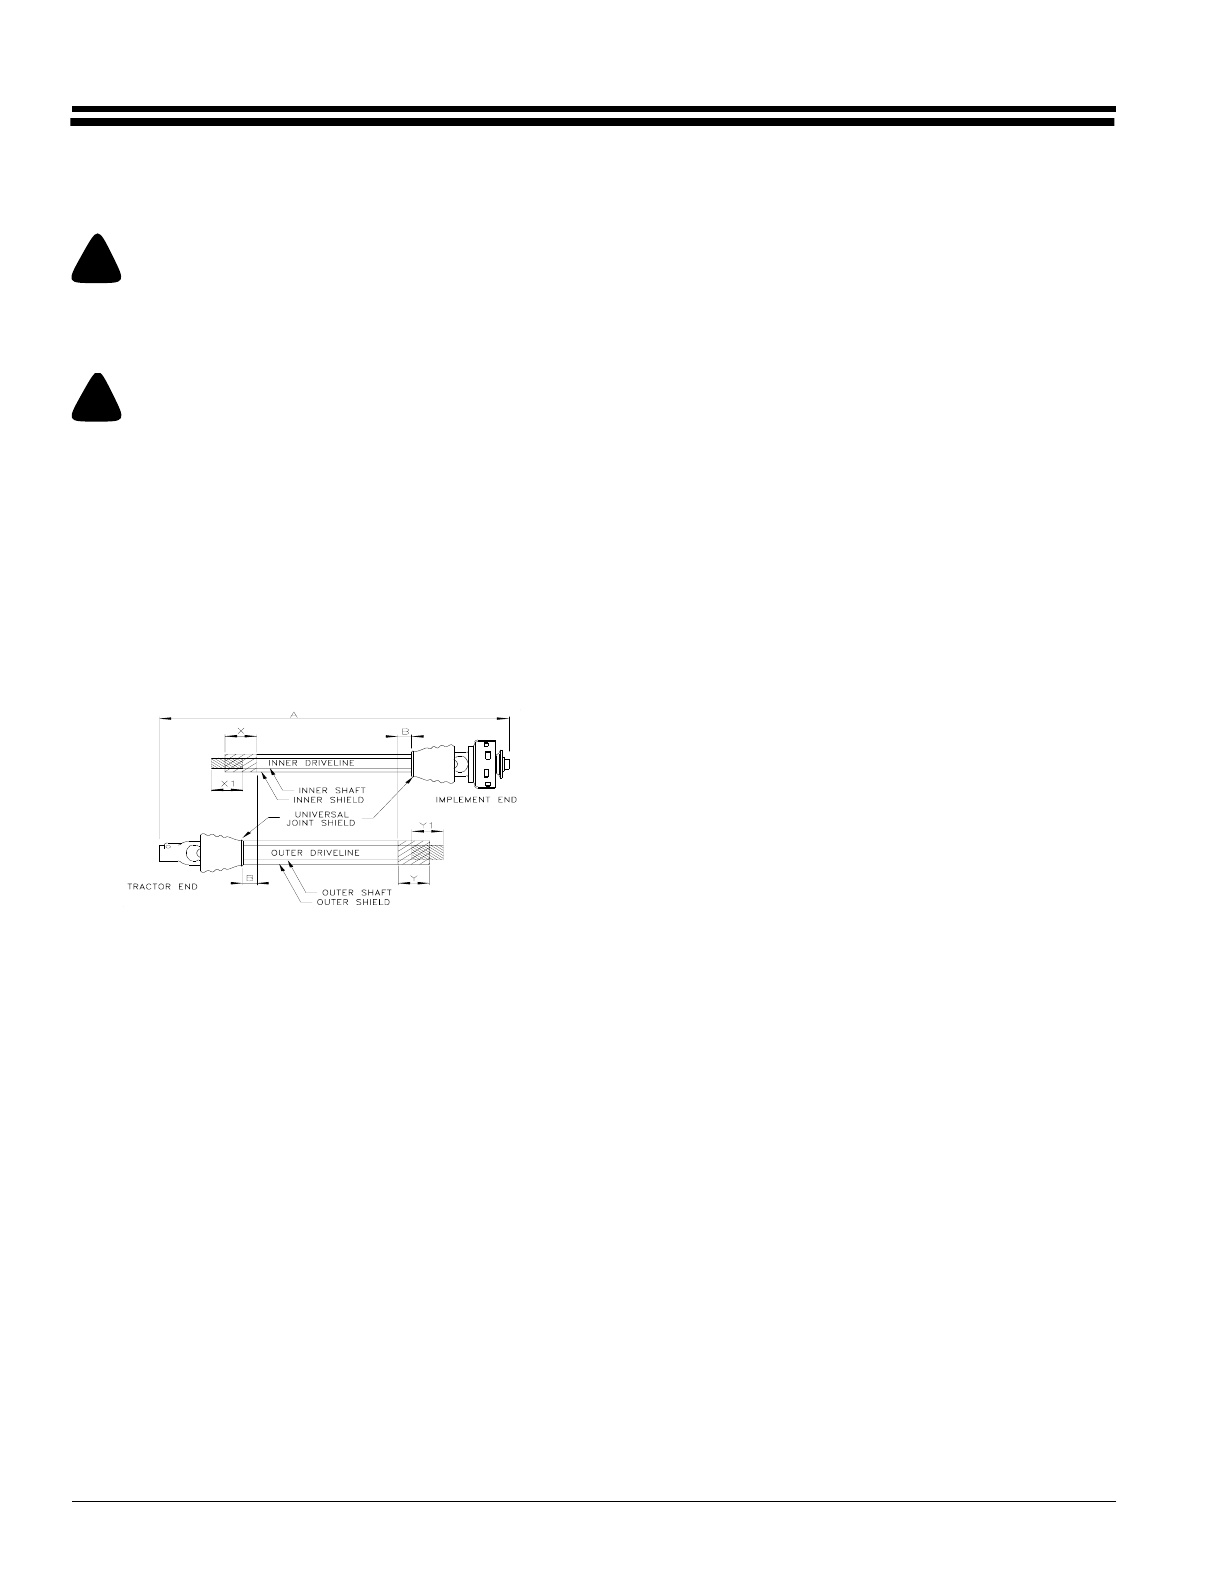
4. Should the driveline require shortening, Figure 3-3:
a. Raise the tractor 3-point hitch so theinput shaft of
the gearbox is in line with the PTO shaft on the
tractor. Shut tractor engine off, leaving the
spresder in position of shortest distance between
shafts, refer to "A" dimension. Securely block
spreader in position.
b. Pull driveline apart as shown in Figure 3-3.
Reattach outer yoke sections to tractor and
gearbox. Pull on each driveline section to be sure
the yokes are locked into place.
c. Hold driveline sections parallel to each other to
determine if too long. Each section should end
approximately 1" ("B" dimension) short of
reaching universal joint shield on opposite
section. If too long, measure 1" ("B" dimension)
back from universal joint shield and mark on
opposite section. Do this for both sections.
d. Cut off shield where marked ("X" dimension). Cut
shaft the same amount ("X" dimension).
e. Repeat the procedure to the other driveline half.
Remove all burrs and cuttings.
Shortening the PTO Shafts
Figure 3-3
13588
f. Apply multi-purpose grease to inside of outer
(female) driveline section.Assembledrivelineand
install on tractor and spreader. Pull on each
driveline section to be sure yokes lock into place.
Make certain driveline shielding is in place and in
good condition.
Operating Instructions
By now youshould haveproperlyinstalled your LandPride
Fertilizer Spreader on your tractor. Based on the type of
material and pounds peracre you intendto broadcast, you
should have referred to the spreading chart in the
operator’s manual to determine the proper tractor ground
speed, distribution gate opening, and spread pattern
setting for your spreader. This process of taking
prescribed fertilizer or seed label rates and making the
necessary spreader setting adjustments is called "initial
calibration".
When setting your spreader up for initial calibration,
following the chemical or seed supplier’s label directions
and using the manufacturer’s application rate setting
charts is "absolutely essential and required". Once you
have achieved your initial calibration, it is time to make
"final calibration" adjustments. Measure off an area where
chemicals or seed are to be applied. An acre is preferred.
Measure out exactly enough product to cover an acre at
the manufacturer’s prescribed rate andput it inthe hopper.
You should have already determined the appropriate
ground speed that will allow you to meet the application
rate and also maintain 540 rpm PTO speed.
Start the tractor and travel to the one-acre plot you have
measured off. Maintaining proper ground and engine
speed, engagethe PTO and openthe distribution gatejust
as you move onto the plot. Look back often to observe
your distribution width and pattern density. Typically the
pattern won’t be as dense on the outer edges. As you
make your turn for an adjacent pass, adjust your travel
path to achieve uniform overlap and pattern density. You
may need to close and open the distribution gate at the
beginning and ending of each pass. Your hopper should
empty out just as you complete coverage of your one-acre
plot. If not, make the necessary adjustments until you are
absolutely confident that you have achieved the proper
final calibration.
Once you have achieved final calibration, load the
spreader hopper with the appropriate amount of material
to be spread. Do not overload hopper with more weight
than is specified for your individual model. If the tractor
front end becomestoo light for proper steering, add tractor
weights to the front end. Proceed with spreading
operations looking back often to ensure a uniform
distribution pattern and to make sure there are no
interruptions to hopper flow.
With a little practice you should become a very good
applicator. Once you are done spreading, disengage the
PTO, park the tractor, set the brake, shut off the tractor,
and remove the keys. When finished, always clean out the
spreader to prevent rust and corrosion.