


3-11
Cisco Unified IP Phone 7965G and 7945G Administration Guide for Cisco Unified Communications Manager 7.0
OL-15427-01
Chapter 3 Setting Up the Cisco Unified IP Phone
Adjusting the Placement of the Cisco Unified IP Phone
See Figure 3-3 for a graphical representation of the phone parts.
Before You Begin
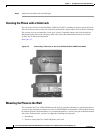
To ensure that the handset attaches securely to a wall-mounted phone, remove the handset wall hook
from the handset rest, rotate the hook 180 degrees, and reinsert the hook. Turning the hook exposes a lip
on which the handset catches when the phone is vertical. For an illustrated procedure, refer to Installing
the Wall Mount Kit for the Cisco Unified IP Phone at:
http://www.cisco.com/en/US/products/hw/phones/ps379/prod_installation_guides_list.html
To mount the phone on the wall using the standard footstand, follow these steps:
Caution Use care not to damage wires or pipes located inside the wall when securing screws to wall studs.
Procedure
Step 1 Push in the footstand adjustment button.
Step 2 Adjust the footstand so it is flat against the back of the phone.
Step 3 Insert two screws into a wall stud, matching them to the two screw holes on the back of the footstand.
The keyholes fit standard phone jack mounts.
Step 4 Hang the phone on the wall.
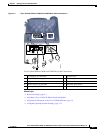
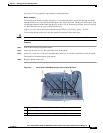
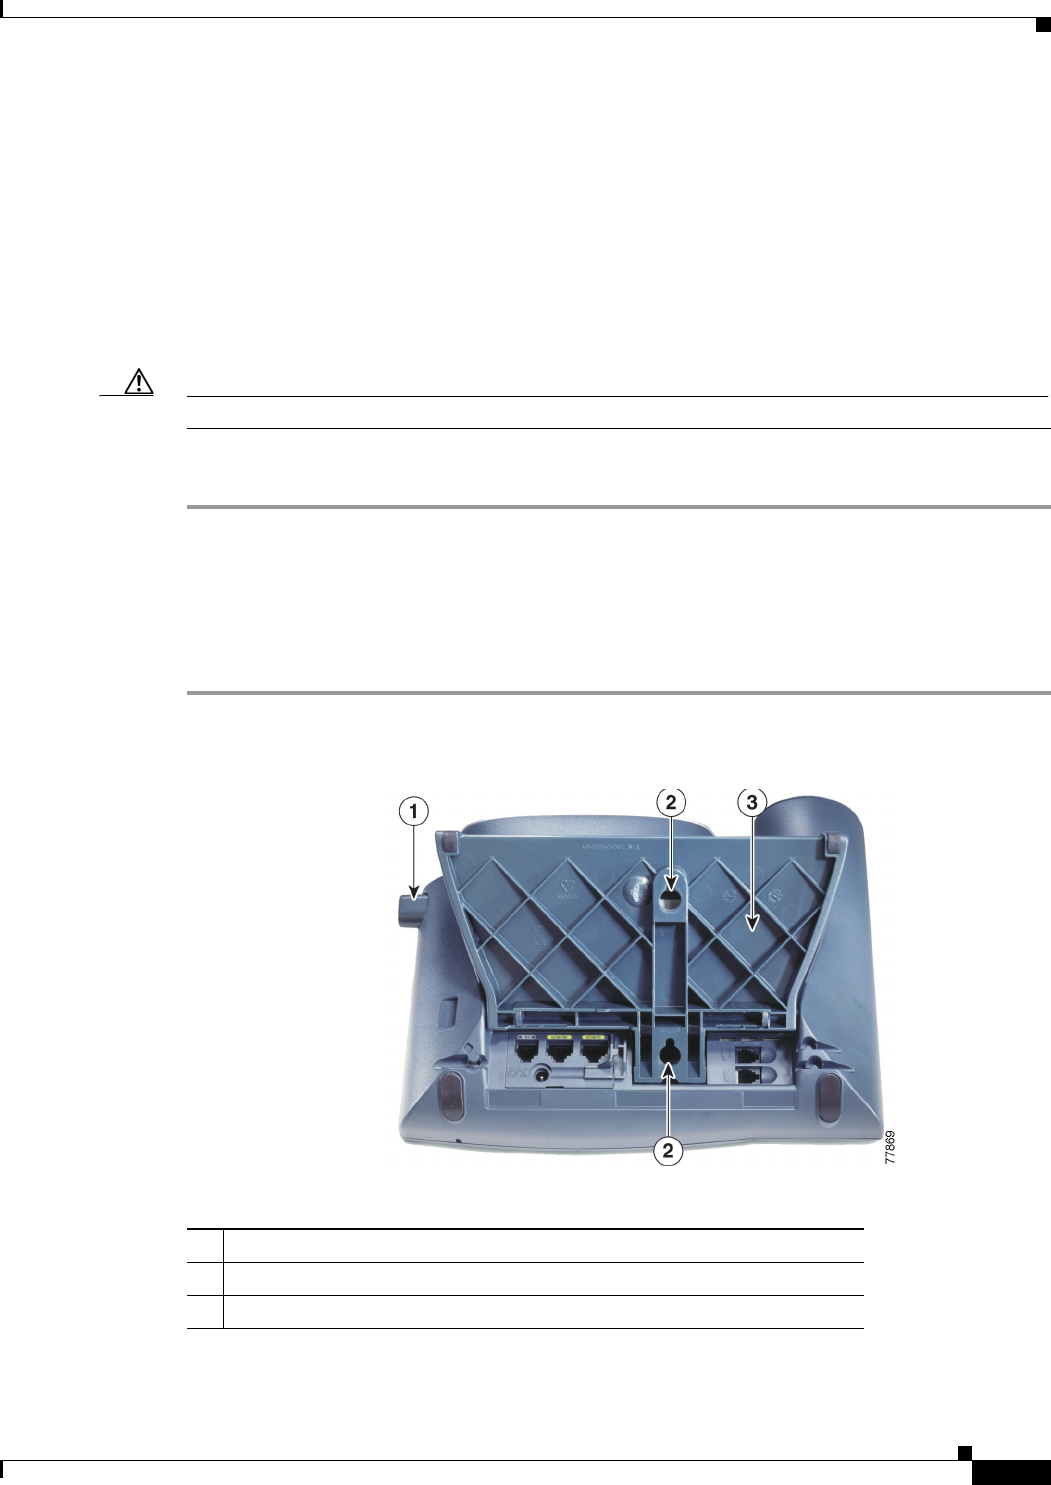
Figure 3-3 Parts Used in Wall Mounting the Cisco Unified IP Phone
1 Footstand adjustment button—Raises and lowers adjustment plate
2 Wall mounting screw holes
3 Adjustment plate—Raises and lowers phone vertically