


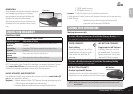
2. With the scala rider Q2
pro
headset turned ON, press and
hold the Volume Up Button for at least six seconds until the
Red and Blue Lights begin rapidly alternating.
3. Search for Bluetooth headsets on your GPS device by following
the device’s instructions. The headset will be listed as “scala
rider Q2 Pro” Please consult your GPS device’s User Manual
for more information.
4. If your GPS device prompts for a PIN or Passkey enter 0000 (four zeros).
5. Your GPS device will conrm that pairing has succeeded. The
headset will begin ashing slowly in Blue.
6. If you wish to use a Bluetooth mobile phone to make and
receive calls through the headset, you must now pair your
mobile phone to your GPS device by following your GPS
and/or mobile phone’s instructions.
NOTE: If the Pairing process is not completed within two
minutes the headset will return to Standby mode.
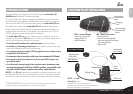
GETTING STARTED
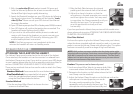
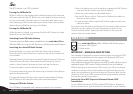
ATTACHING THE CLAMP ON THE HELMET
The Helmet Clamp must be attached to the left side of the helmet.
Once attached, the headset unit can be mounted or released from
the Helmet Clamp at any time. If you wish to connect your MP3 player
to your headset, please refer rst to the assembly instructions listed in
section: CONNECTING YOUR MP3 PLAYER TO YOUR HEADSET.
There are two methods that can be used in order to attach the Clamp
onto the helmet:
Standard Method: Recommended for most helmet types.
Glue Plate Method: Recommended for helmets to
which the standard method cannot be applied,
using the Glue Plate included in the box.
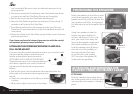
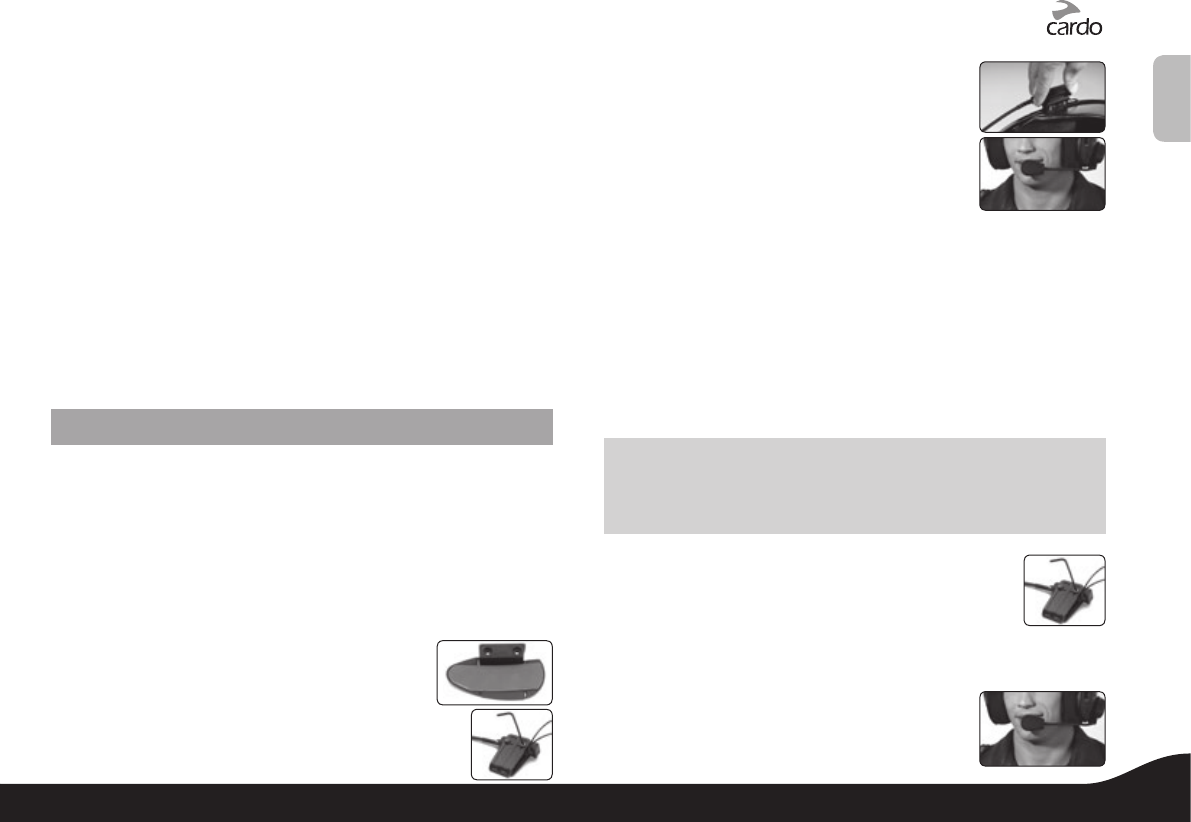
Standard Method
1. Use the enclosed Allen Wrench to loosen the two
screws on the Back Plate.
2. Slide the Back Plate between the internal
padding and the external shell of the helmet.
3. Adjust the clamp’s location so that the
microphone is located opposite your mouth
and then tighten the screws. You may need
to reposition the Clamp repeatedly until you
identify the best spot. The microphone
must be positioned vertically and not
horizontally.
If you have purchased a helmet clamp version with the corded micro-
phone, please refer to section ATTACHING THE CORDED MICROPHONE
CLAMP ON A FULL-FACED HELMET
Glue Plate Method
You have the option to glue the Helmet Clamp onto your helmet,
when the above standard method cannot be used, or in case you
prefer to secure the Helmet Clamp with adhesive glue. This option
has been successfully used for a range of high end helmets.
NOTE: While we have no reason to believe that the gluing option might
negatively aect any helmet, Cardo does not assume any responsibility to
that aect, irrespective of its nature and circumstances. The Glue Plate is
oered as a free option that you may choose to use at your own risk and
subject to renouncement of any future claims.
Caution: This process can be done only once!
1. Use the enclosed Allen Wrench to remove both Allen
screws and release the Helmet Clamp’s back plate.
2. Determine the location on the helmet where the Hel-
met Clamp must be attached.
3. Adjust the Helmet Clamp’s location on the Helmet so that the
microphone is located opposite your mouth.
You may need to reposition the Clamp
repeatedly until you identify the best spot. The
microphone must be positioned vertically and
English
7
scala rider
®
Q2
™
MultiSet pro